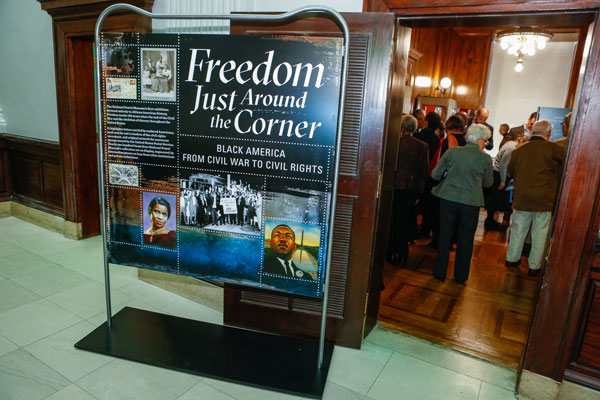
OEC produced the graphics for Freedom Just Around the Corner, a graphic show in the prestigious Postmaster’s Suite at the National Postal Museum. The 57 graphics included small object labels, reader rails, in-case graphics, and large-scale signage. Freedom Just Around the Corner is the National Postal Museum’s first exhibit “devoted entirely to African American history.”
For OEC, one notable aspect of the graphic production was the use of large sign blank. The sheer size of the graphics required tiling the files and piecing them together. After determining the best way to tile the graphics, the images were printed directly to the sign blank and then assembled into the final image at the National Postal Museum.
This large-scale graphic was tiled together.
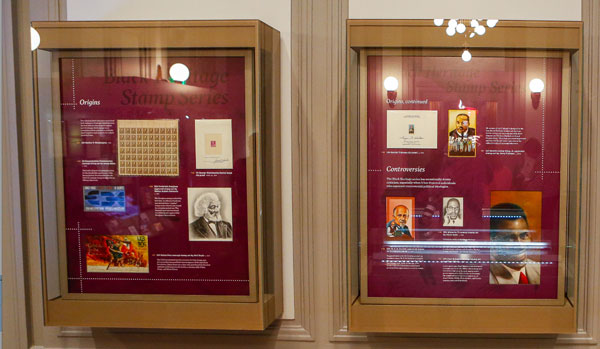
This exhibit also offered OEC a chance to work with new equipment. This was the first show that required the use of our new automated mat cutter. Mat cutting previously involved placing the object, marking its corners with pinholes, and then cutting the mat to size using the pinholes as a “connect the dots” frame. With the automated mat cutter, the mat cuts were programmed into an Illustrator file. The file is then uploaded to the mat cutter, which makes precision cuts from the layout provided.
Graphics specialist Evan Keeling used our new mat cutter to create the frames for the stamps.
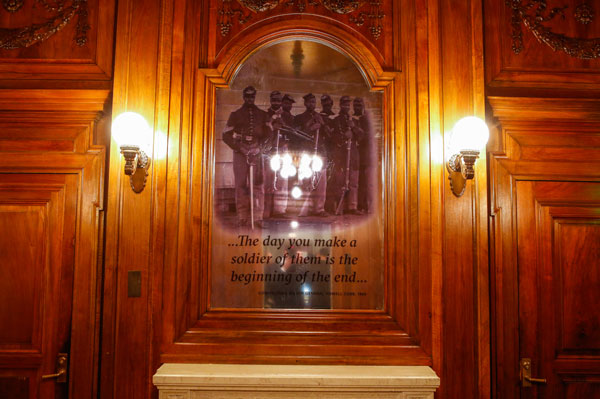
One of the signature images in the exhibition had unique challenges. This graphic, consisting of a reproduced Civil War era photograph and quote, is placed directly on an arch-topped mirror. The first challenge was simply a matter of materials. In general, working on a reflective surface can be an exacting task. Further complicating things, the mirror is a permanent fixture within the Postmaster’s Suite. This meant that the graphic had to be applied on-site, not at OEC. Evan worked around these obstacles by creating a template of the mirror out of Sintra. He used the template to examine the proportions and color of the graphic, and determine how to best apply it to the mirror. After experimenting on the template at OEC, Evan finalized the graphic. This ensured that the application of the graphic would go – literally – smoothly.
The reproduction black-and-white photograph applied to the mirror makes a poignant visual.
Installation did go smoothly, and Freedom Just Around the Corner will remain on display through February 16, 2016.
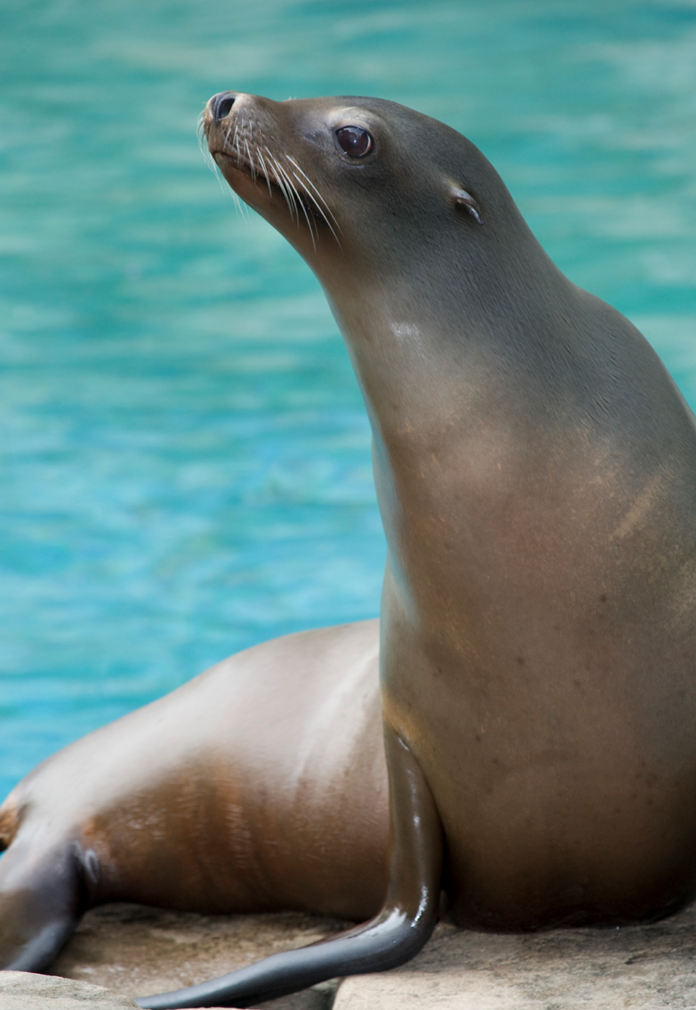
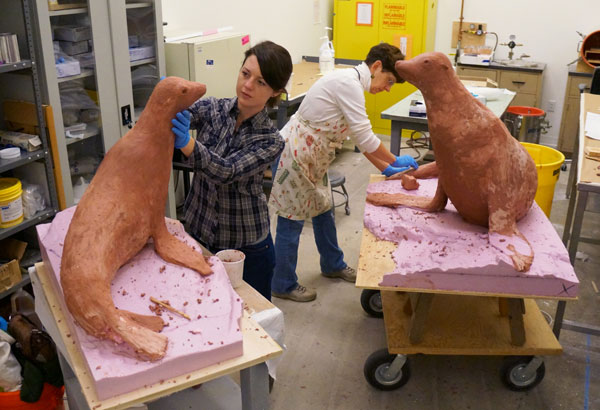
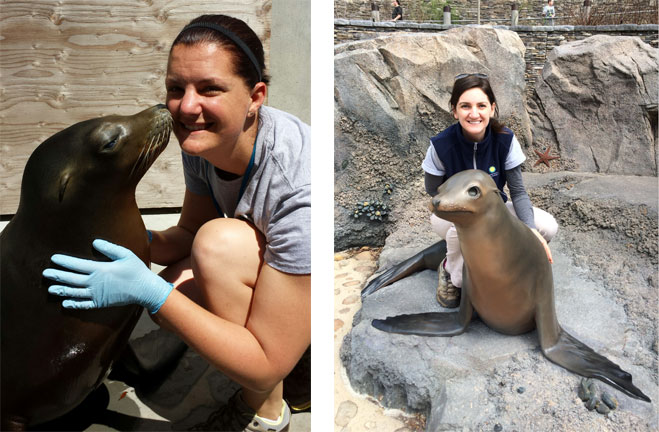
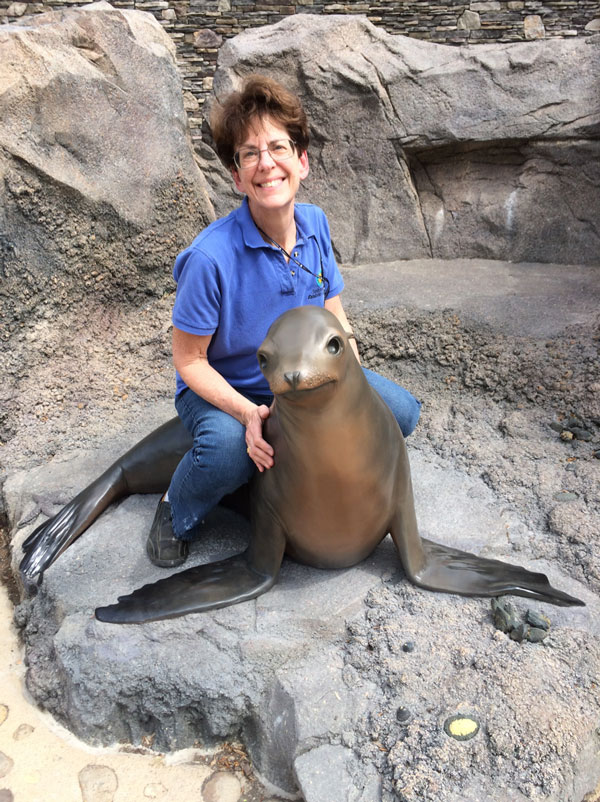
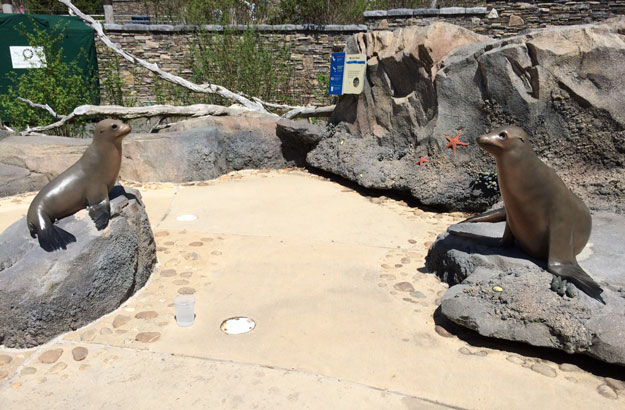
OEC’s 3D studio isn’t just for model making. We can create original sculptures, too. Sculptor Lora Collins, who is also the 3D Studio supervisor, designed and sculpted the sea lion statues that were recently installed at the National Zoo.
Lora created the sea lion mom and pup using a combination of traditional art techniques and high tech innovations.
First, Lora met with animal keepers Rebecca Sturniolo and Chelsea Grubb at the National Zoo to discuss the project, scout out the location for the statues, and meet her model.
Our model Calli strikes a regal pose. Don’t hate her because she’s beautiful.
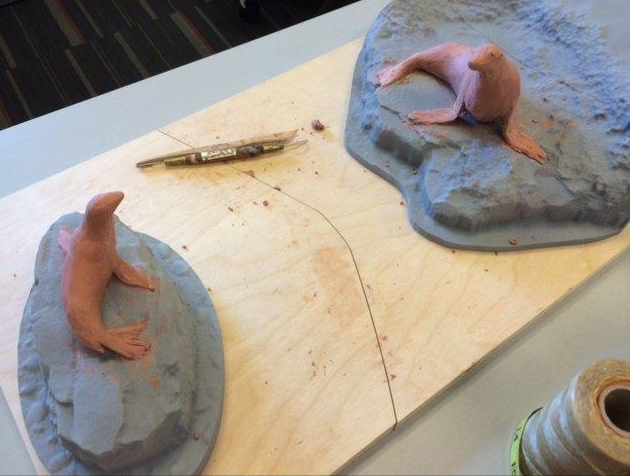
Next, Lora sculpted 3-inch-high maquettes to present to the Zoo. The mini-sea lions were placed on scale model replicas of their future rock bases. To accomplish this, Megan Dattoria and Carolyn Thome scanned the rocks at the Zoo, and Chris Hollshwander cut the scale models using the CNC router. By digitally capturing the surface of the rocks and importing that information into the CNC router, OEC ensured that the statues and the bases would fit together like puzzle pieces. The maquettes gave the Zoo a chance to see what the statues would look like, and also how they would be placed on the rocks.
Maquettes are preliminary sketches or miniatures that artists use to provide a preview of their work.
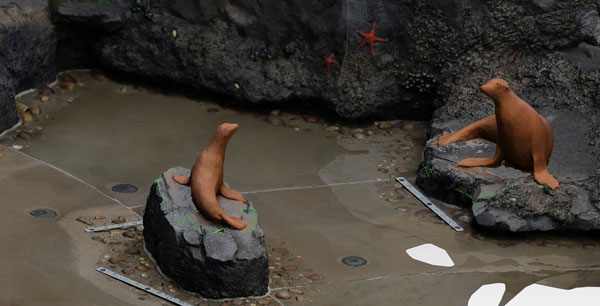
To give an even better idea of how the completed statues would look, the maquettes were scanned and the images were placed into a digital model of the Zoo.
Creating a computerized rendering of the final placement gives OEC and the Zoo a chance to see how this will look before the full-sized statues are even started.
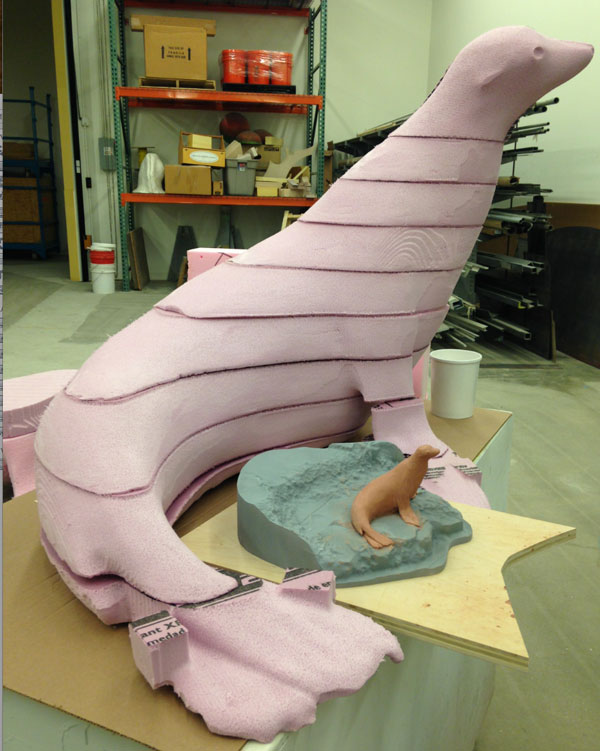
After the Zoo approved the maquettes, Lora created the full-size sculptures. Carolyn used the scans from the digital model to create a file for the CNC router. This time, Chris used the router to cut out sections of foam to build the internal structure, called armature, of the statues.
Stacked pieces of foam create a larger version of the maquette, shown in front.
After assembling the armature, Lora and exhibit designer Kristen Orr covered the foam in roughly half an inch of oil-based clay. While it might seem like this would get the sculpture most of the way to complete, that is not the case. In fact, they aren’t even at the halfway point. Now that the sculptures are larger, there is more room for lifelike detail. And details take a lot of time.
Kristen and Lora apply clay to the foam armature.
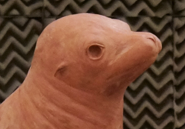
What exactly does “lifelike detail” mean? In this case, it means that Lora worked with animal keepers Rebecca and Chelsea to ensure accurate representations of all the things that make sea lions so adorable: chubby cheeks, fat rolls, whiskers, and – in an interesting twist – no eyes.
No eyes?
Shadows create the illusion of eyes.
Lora left an open socket instead of inserting an eye, because the shadows created by the socket would look like a sea lion’s inky eye.
And then of course, they had to add the toenails.
Sea lions have toenails?
Lora inserted wooden dowels directly into the clay to create toenails that look just like Calli’s, shown on the right.
Sculpting a sea lion’s coat is very time-consuming. Our sea lions are sitting on rocks as if they have just leapt out of the water. Sea lions, while furry, have a sleek, smooth appearance when they emerge from the water. Achieving this level of smoothness takes weeks – yes, weeks – to remove the bumps and imperfections on the surface. So our sea lions got a blowout. Well, not exactly, but Lora and Kristen did use a hair dryer to warm the clay to make it more malleable. They also applied denatured alcohol to smooth it.
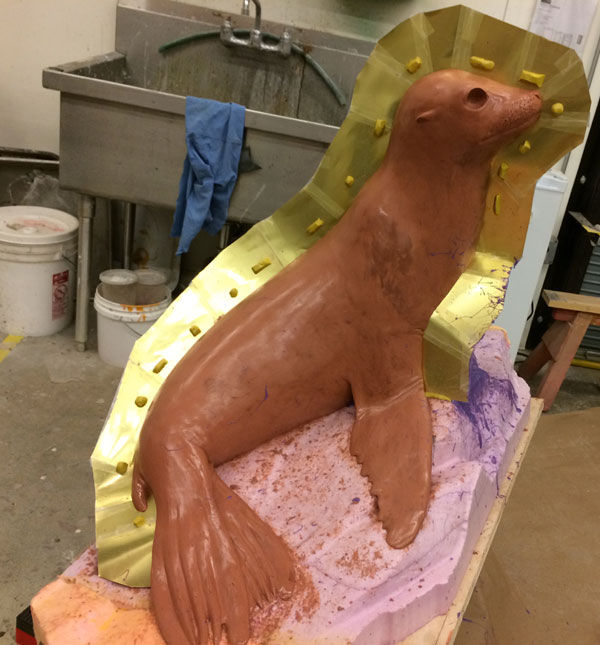
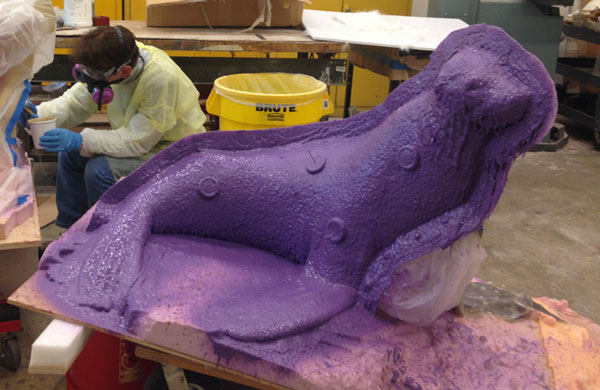
After the Zoo approved the life-sized clay models, they were cast in fiberglass. To do this, both clay sea lions had to be split into three sections with brass sheets, or shims.
Brass shims divide the clay sculptures into three sections.
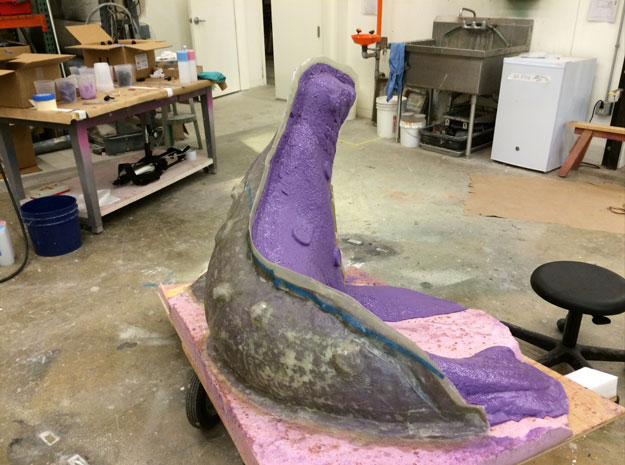
Once the shims were in place, Lora sprayed the clay sculpture with silicone rubber. Then, working in sections, Lora applied several layers of fiberglass and polyester resin on top of the rubber to create a hard shell. She repeated this step for each section of the sculptures. Each section required a full day of work, meaning it took six days to make the molds.
The section on the left has been covered in fiberglass. The other sections are still only covered in purple rubber.
When this step is completed, the negative space inside the rubber mold serves as the form for the final fiberglass sculpture.
Appearances can be deceiving. The outside of the rubber coating might not look as good as the clay model, but the interior of the rubber mold picks up all of the details – from the whiskers down to the toenails. Just like your mom told you, it’s what is on the inside that counts.
After creating the mold, Lora trimmed away the edges, called flange by sculptors. Then she drilled holes into the mold so that she could bolt the molds shut.
After the mold was completed, the three sections were pulled apart and cleaned for casting. Lora, with help from Megan, Daniel Fielding, and Brad Ruprecht cast the sea lion in vinyl ester resin. Then additional resin and fiberglass were layered into the mold to add thickness and strength. Finally, they bolted together the mold and sealed its seams with fiberglass.
Then they repeated the casting process for the other mold. Each casting took one day.
The first layer applied, called a gel coat, is the outermost layer. This layer can be tinted, as it was here.
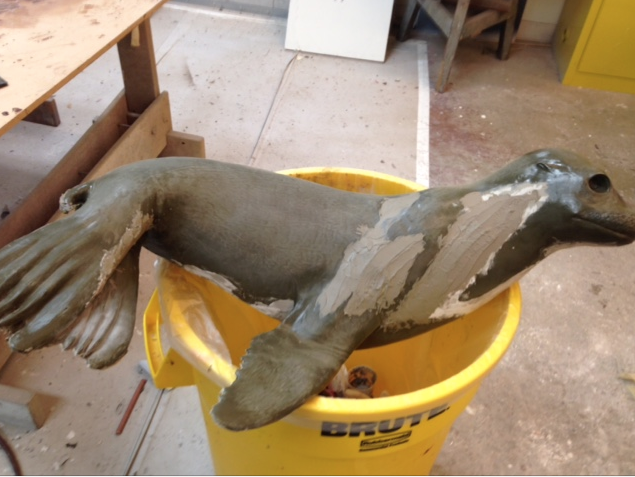
The next day Lora opened the molds and removed the sculptures. After grinding off excess fiberglass and resin, filling in thinner spots, and adding reinforcing layers along the edges and flippers, Lora fiberglassed three stainless steel brackets, custom-made by Chris, into the castings. The brackets allowed for a secure yet non-permanent attachment to the rock.
When first removed from the mold, the statues have visible seams that need to be sanded down. Part of an open mold can be seen in the background.
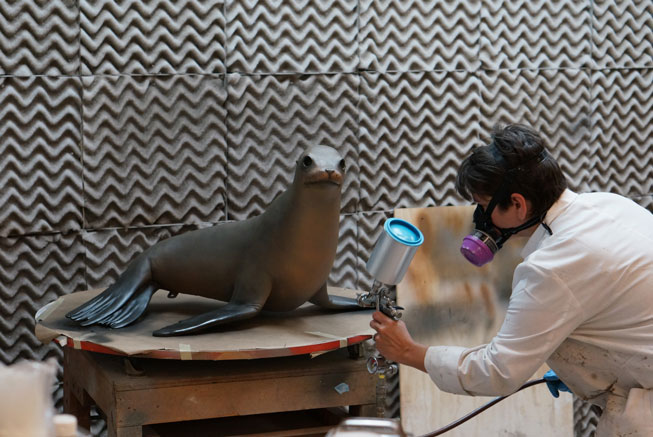
At this point, Lora applied polyester resin fillers as needed, sanded the sculptures smooth, and primed them for painting. Erin Mahoney and Carolyn Thome painted the sea lions with automotive paint and sprayed the finished sculptures with a protective clear coat.
A sea lion gets a few final touch ups of resin filler.The primed statues are ready for their paint jobs.
Carolyn paints the pup.
Painted and ready to go to the Zoo!
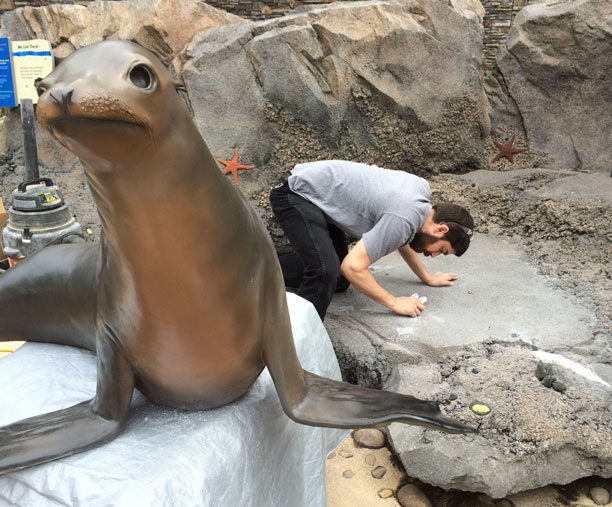
Finally, after all of those steps, the sea lions – and a team from OEC – arrived at the Zoo for installation on April 15.
Fernando Dominguez, shown here, installed the sea lion sculptures with Lora, Carolyn, and Megan.
Inspiration and Art: On the left, Chelsea poses with the real Calli. At right, Rebecca shows off one of the American Trail’s new statues.Lora sits with one of her wonderful statues.Mom and pup gaze at each other in their new home.
You can see the new sea lion statues along the American Trail at the National Zoo.
We love our exhibitions and we want people to come and see them in person. Unfortunately, a trip to Washington just isn’t in the cards for everyone. Luckily, sometimes the Smithsonian is able to come to you. Today, a traveling version of the National Museum of Natural History’s Hall of Human Origins begins a journey to libraries across the United States. (If you can’t visit Exploring Human Origins in person, you can still view the digitized Human Origins 3D collection online.)
At OEC we’re particularly excited about the traveling Exploring Human Origins exhibition. To get this show on the road, our model shop had the remarkable task of making 95 skulls.Additionally, the model shop oversaw the creation of five nylon skulls that were printed off-site from OEC files, and then painted at OEC.
Five nylon skulls are used in interactives in the Exploring Human Origins exhibit. The nylon skulls were painted with automotive paint to withstand the stresses of being handled by visitors.
In addition to the five skulls used in the exhibition, each of the nineteen hosting libraries will receive copies of the five skulls. OEC is printing those skulls in-house.
The obvious question is: how do you go about making a few dozen skulls?
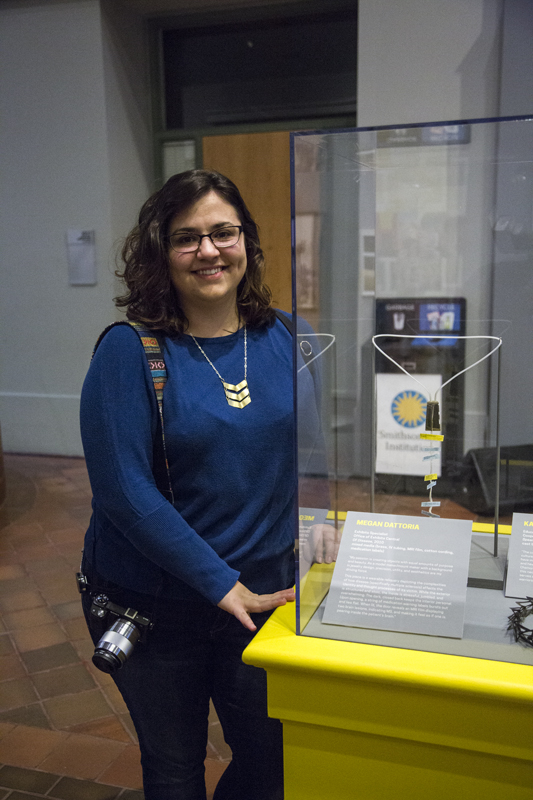
OEC’s Carolyn Thome, Megan Dattoria, and Erin Mahoney were willing to explain.
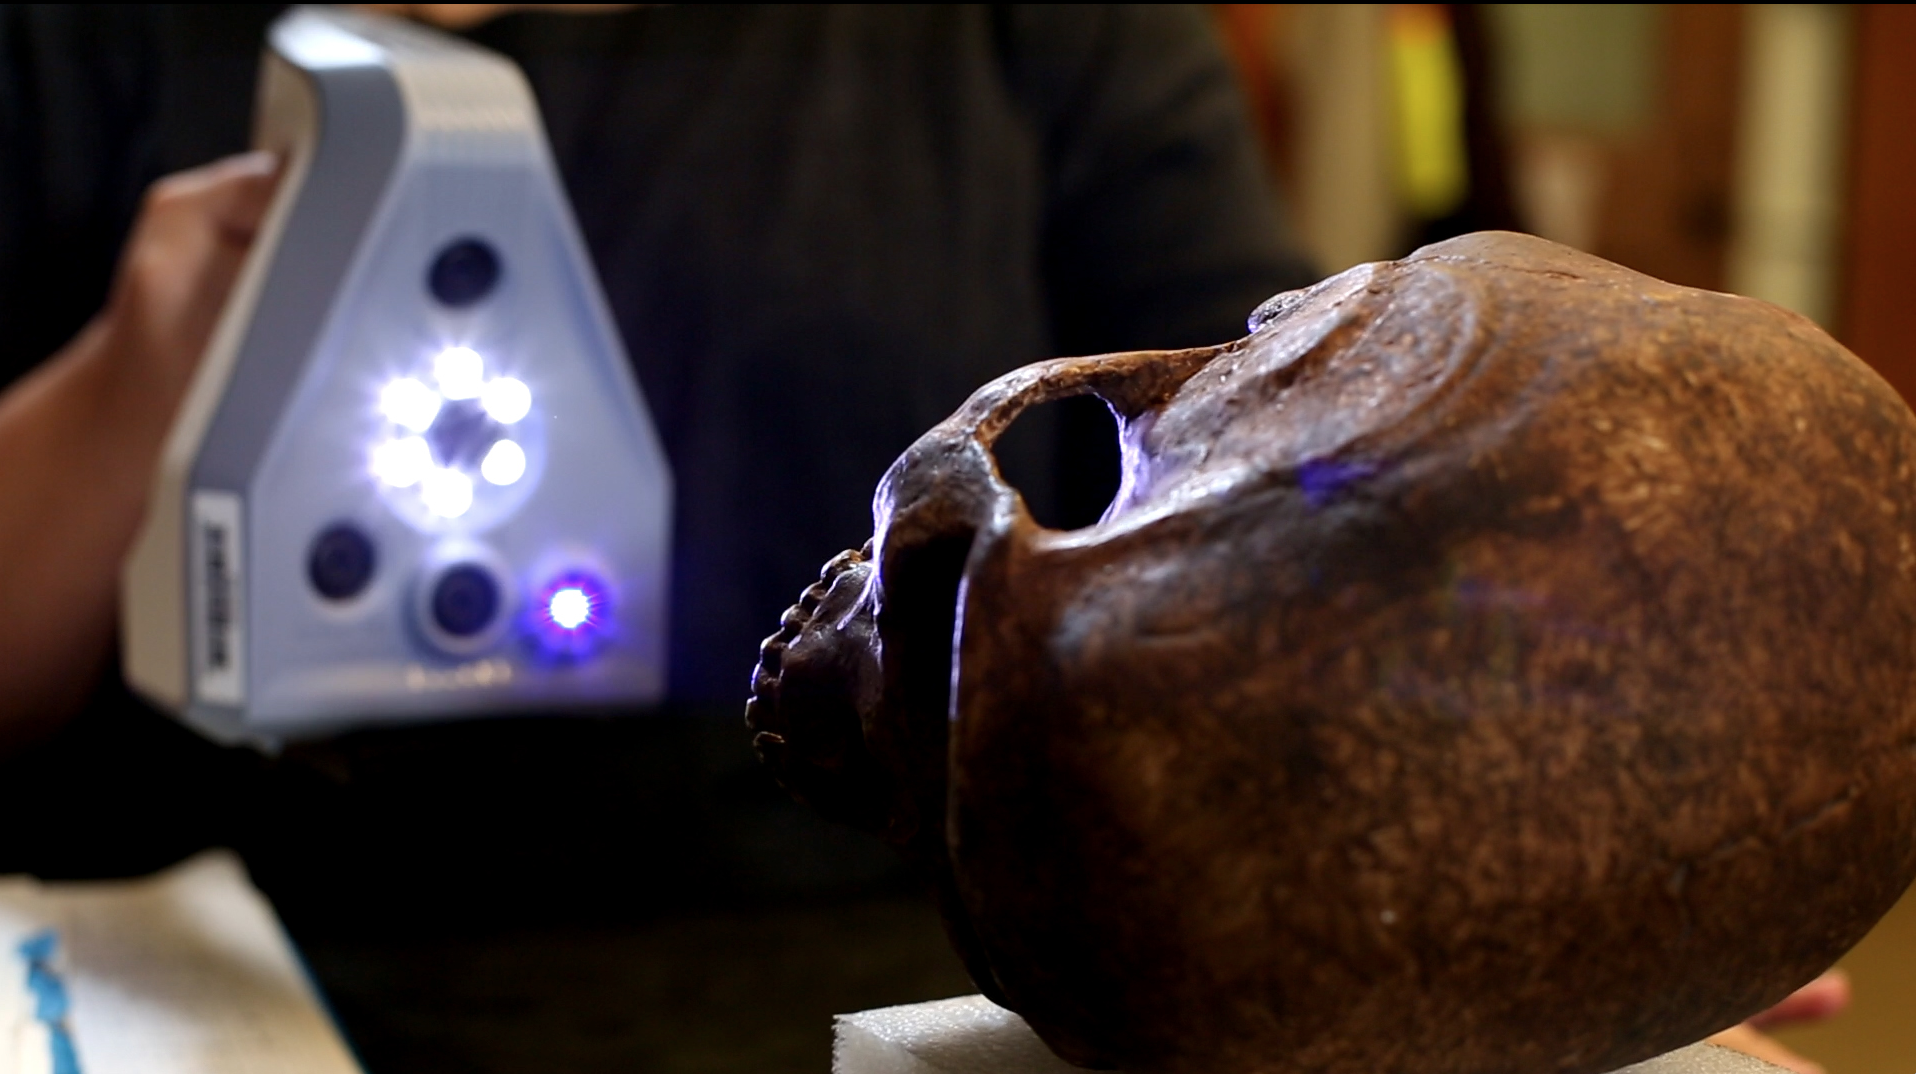
It all starts with a scan – and then more scans. Scanning is how the model makers gather their data – the density, cracks, seams, ridges – any and all details that need to be copied.
A scanner records the details of a cast of the Fish Hoek skull. All of the skulls scanned are from the Human Origins Program research collection.
Once the data is collected, it’s processed to create a file. That file is used to 3D print the skull.
Carolyn Thome uses the Artec scanner software to process the file for 3D printing. The Fish Hoek skull keeps her company.
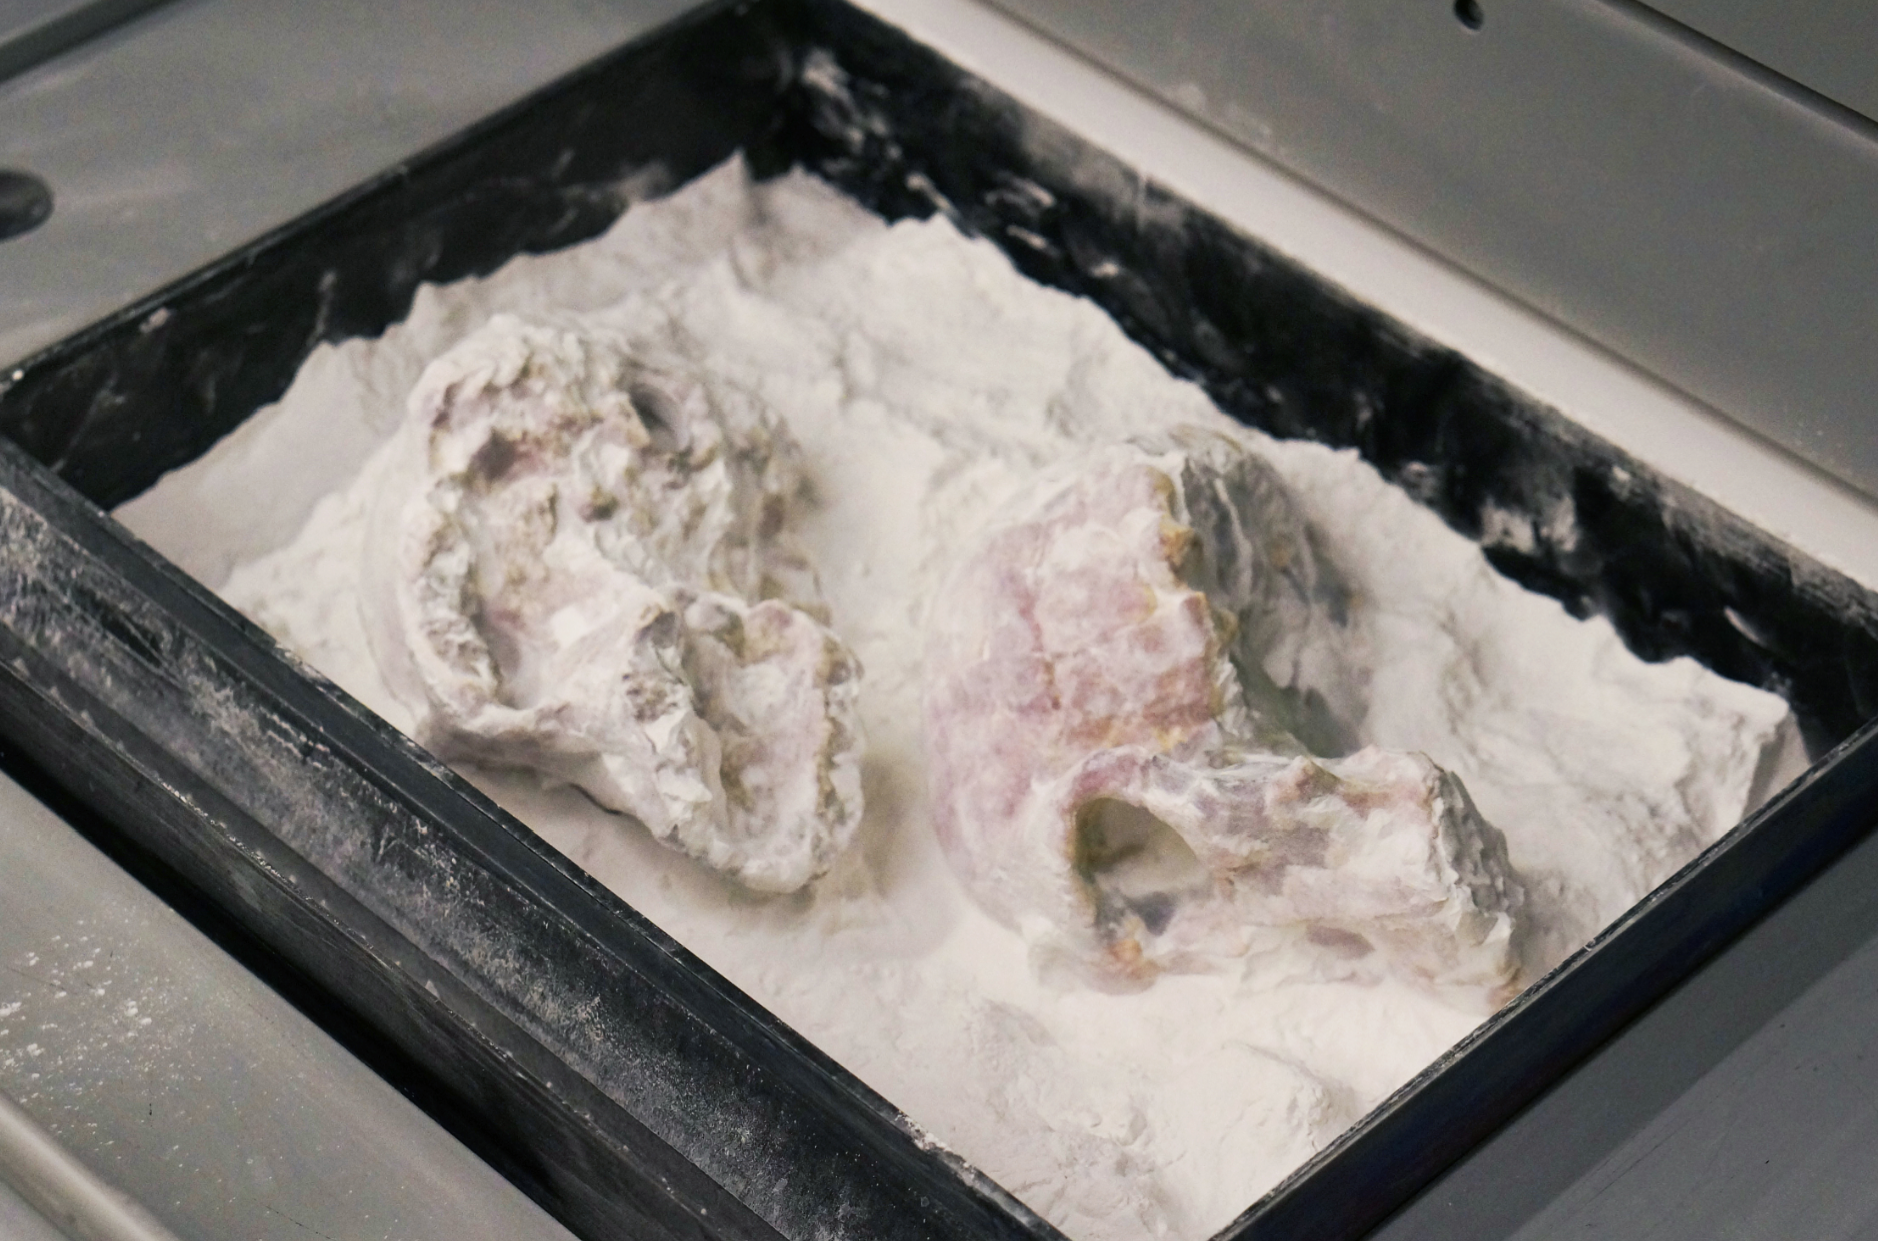
The skull is printed out of gypsum powder. Depending on the final size of the 3D replica, it could be printed in several pieces and assembled later.
Two of the skulls, fresh off the printer, await their next step towards being exhibit-ready.
Gypsum powder is messy, and the completed prints need to be cleaned. Model makers use a vacuum to remove the residue from the skull.
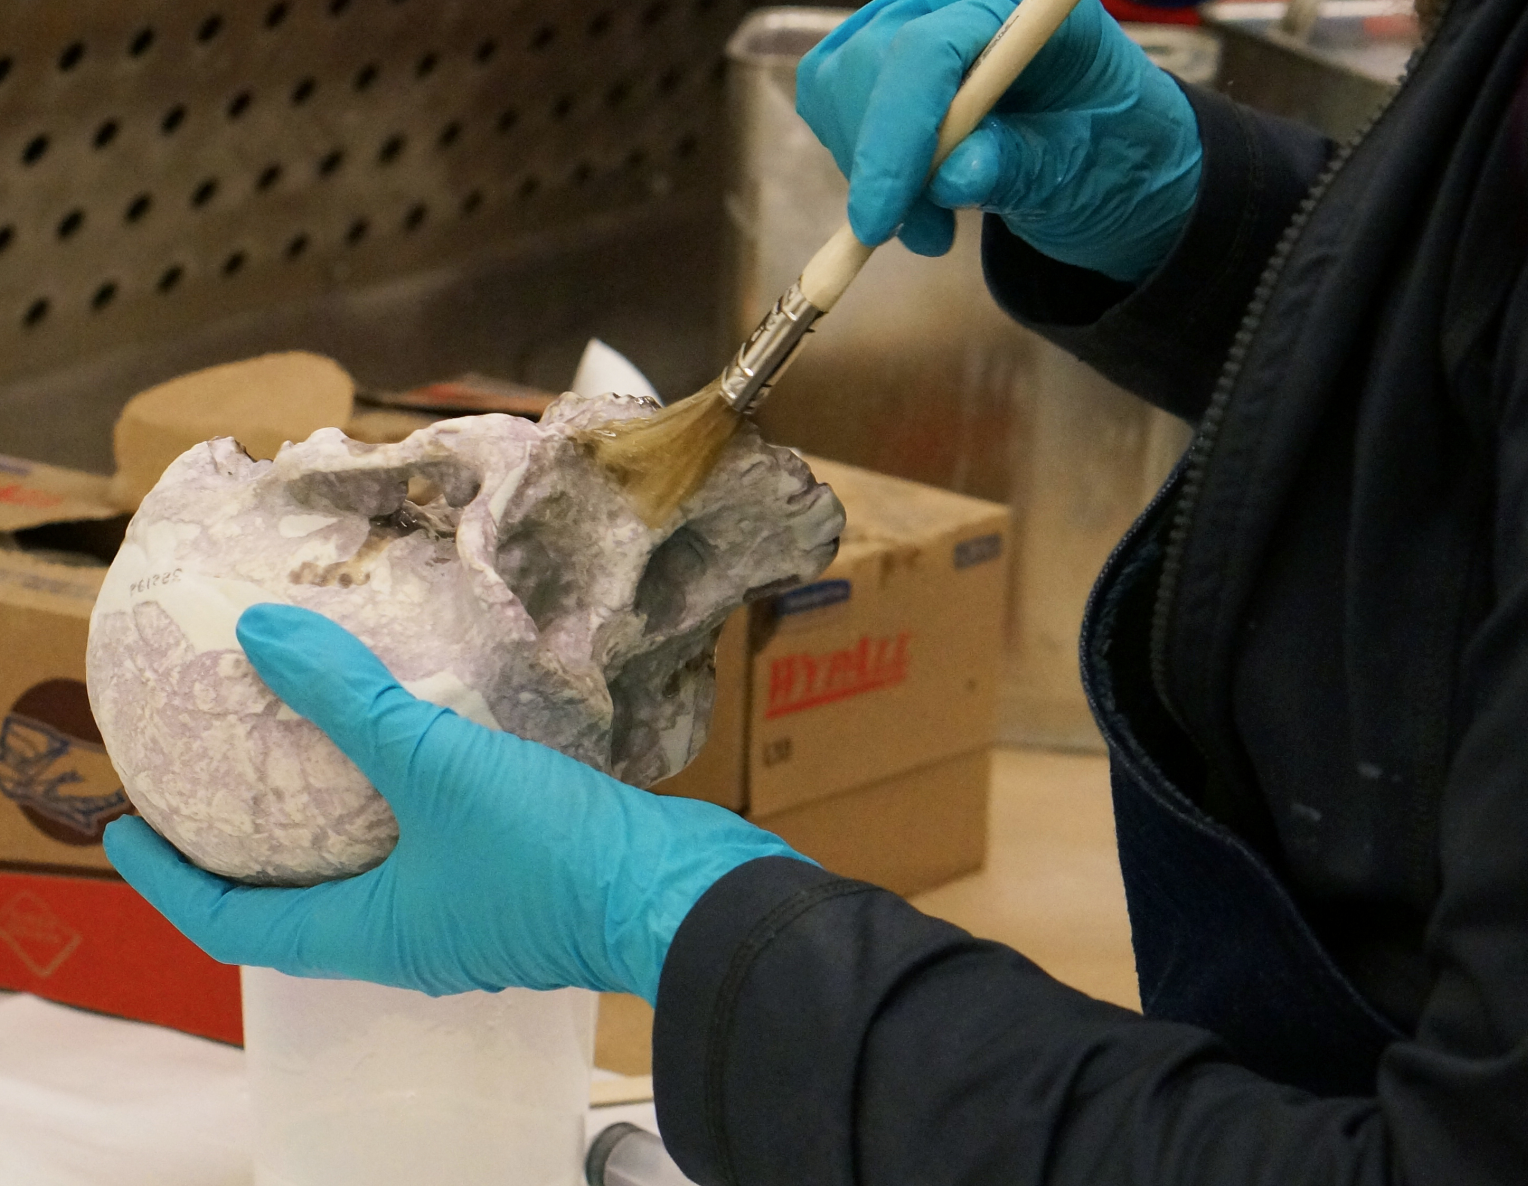
Freshly printed skulls (or 3D printed anything for that matter) are very fragile. Infiltrating them with an epoxy makes them more durable. After infiltration, the skull needs 24 hours to dry.
The epoxy soaks into the gypsum powder, creating a much more durable object.
Each printed skull needs to be sanded by hand to remove build lines. Build lines are the thin layers that accumulate as the gypsum powder forms the replica.
Erin Mahoney sands the underside of a printed skull.
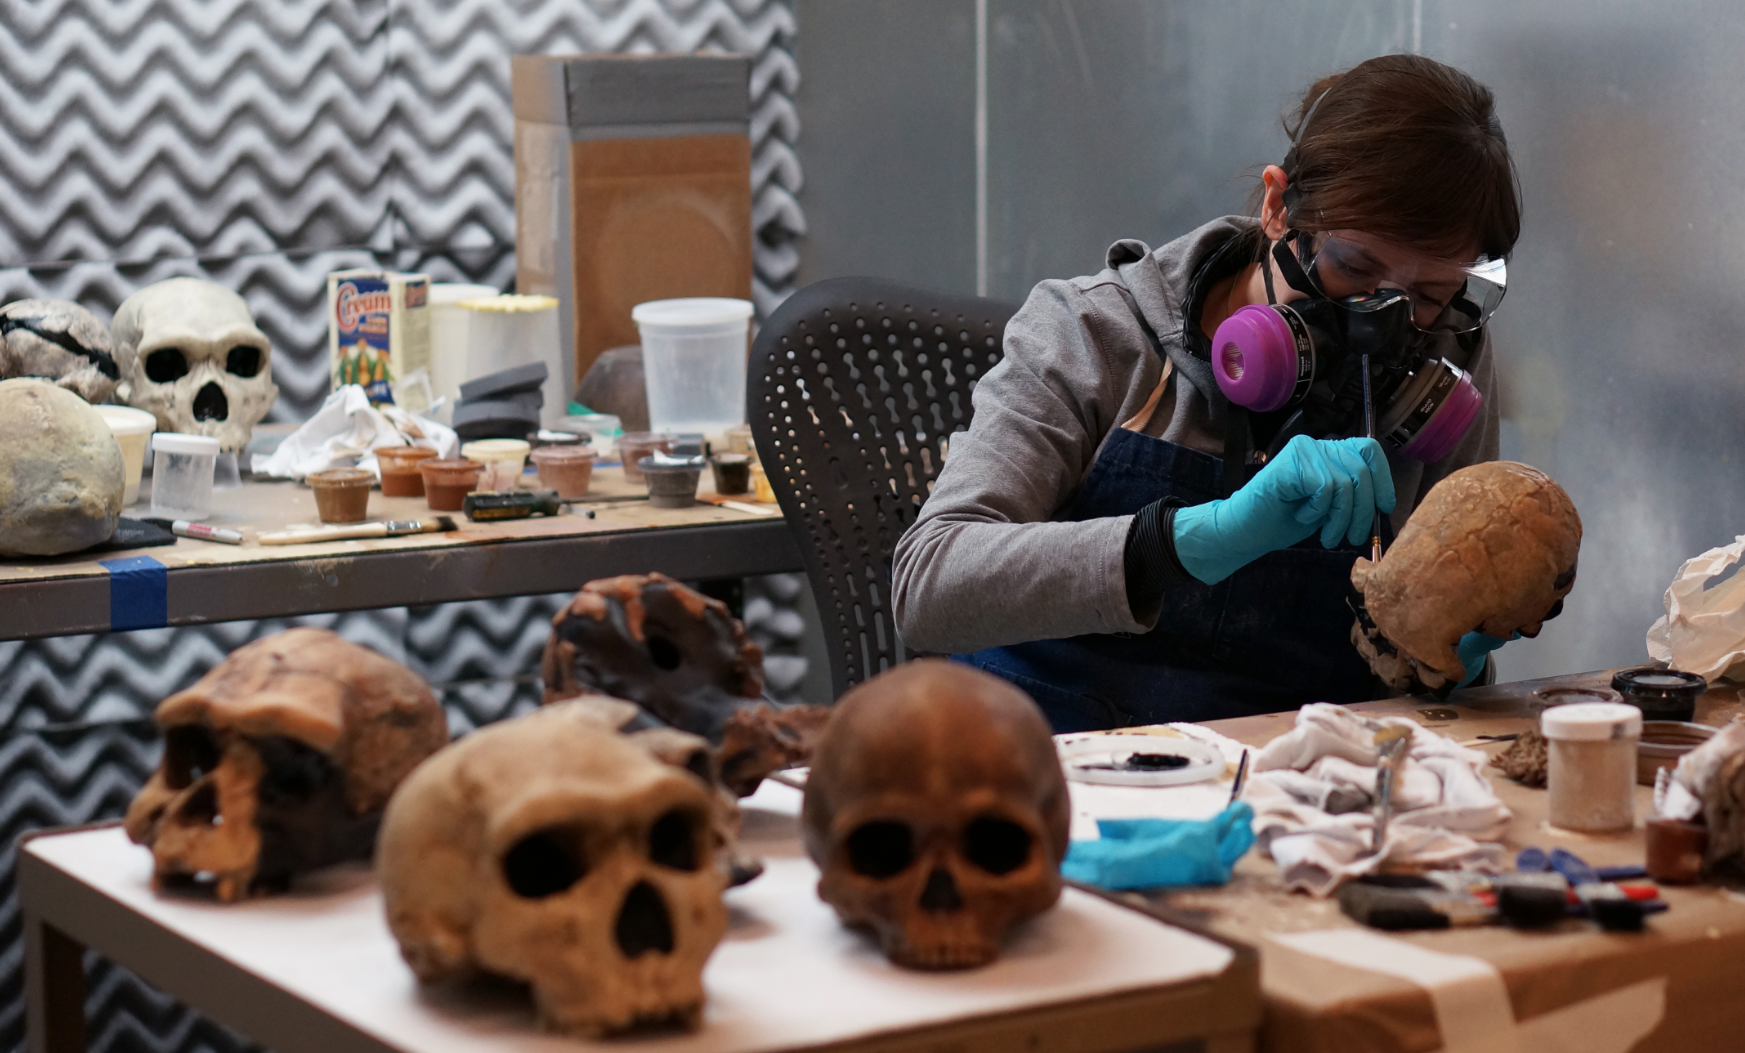
The skulls come out of the printer the color of the gypsum powder. While that’s still amazing – these are 3D printed skulls after all – it’s a bit like looking at a black and white copy of a color photo. The skulls have to be hand-painted to truly look like the original.
After sanding off the build lines, Erin paints the skull. She uses multiple images of the originals as a guide as she creates the mottled appearance of old bones.
The final product then gets a clear coat of automotive sealer to protect the paint.
After applying the clear coat, the skull needs 12 hours to dry.
A complete set of five skulls awaits shipping to a host library.
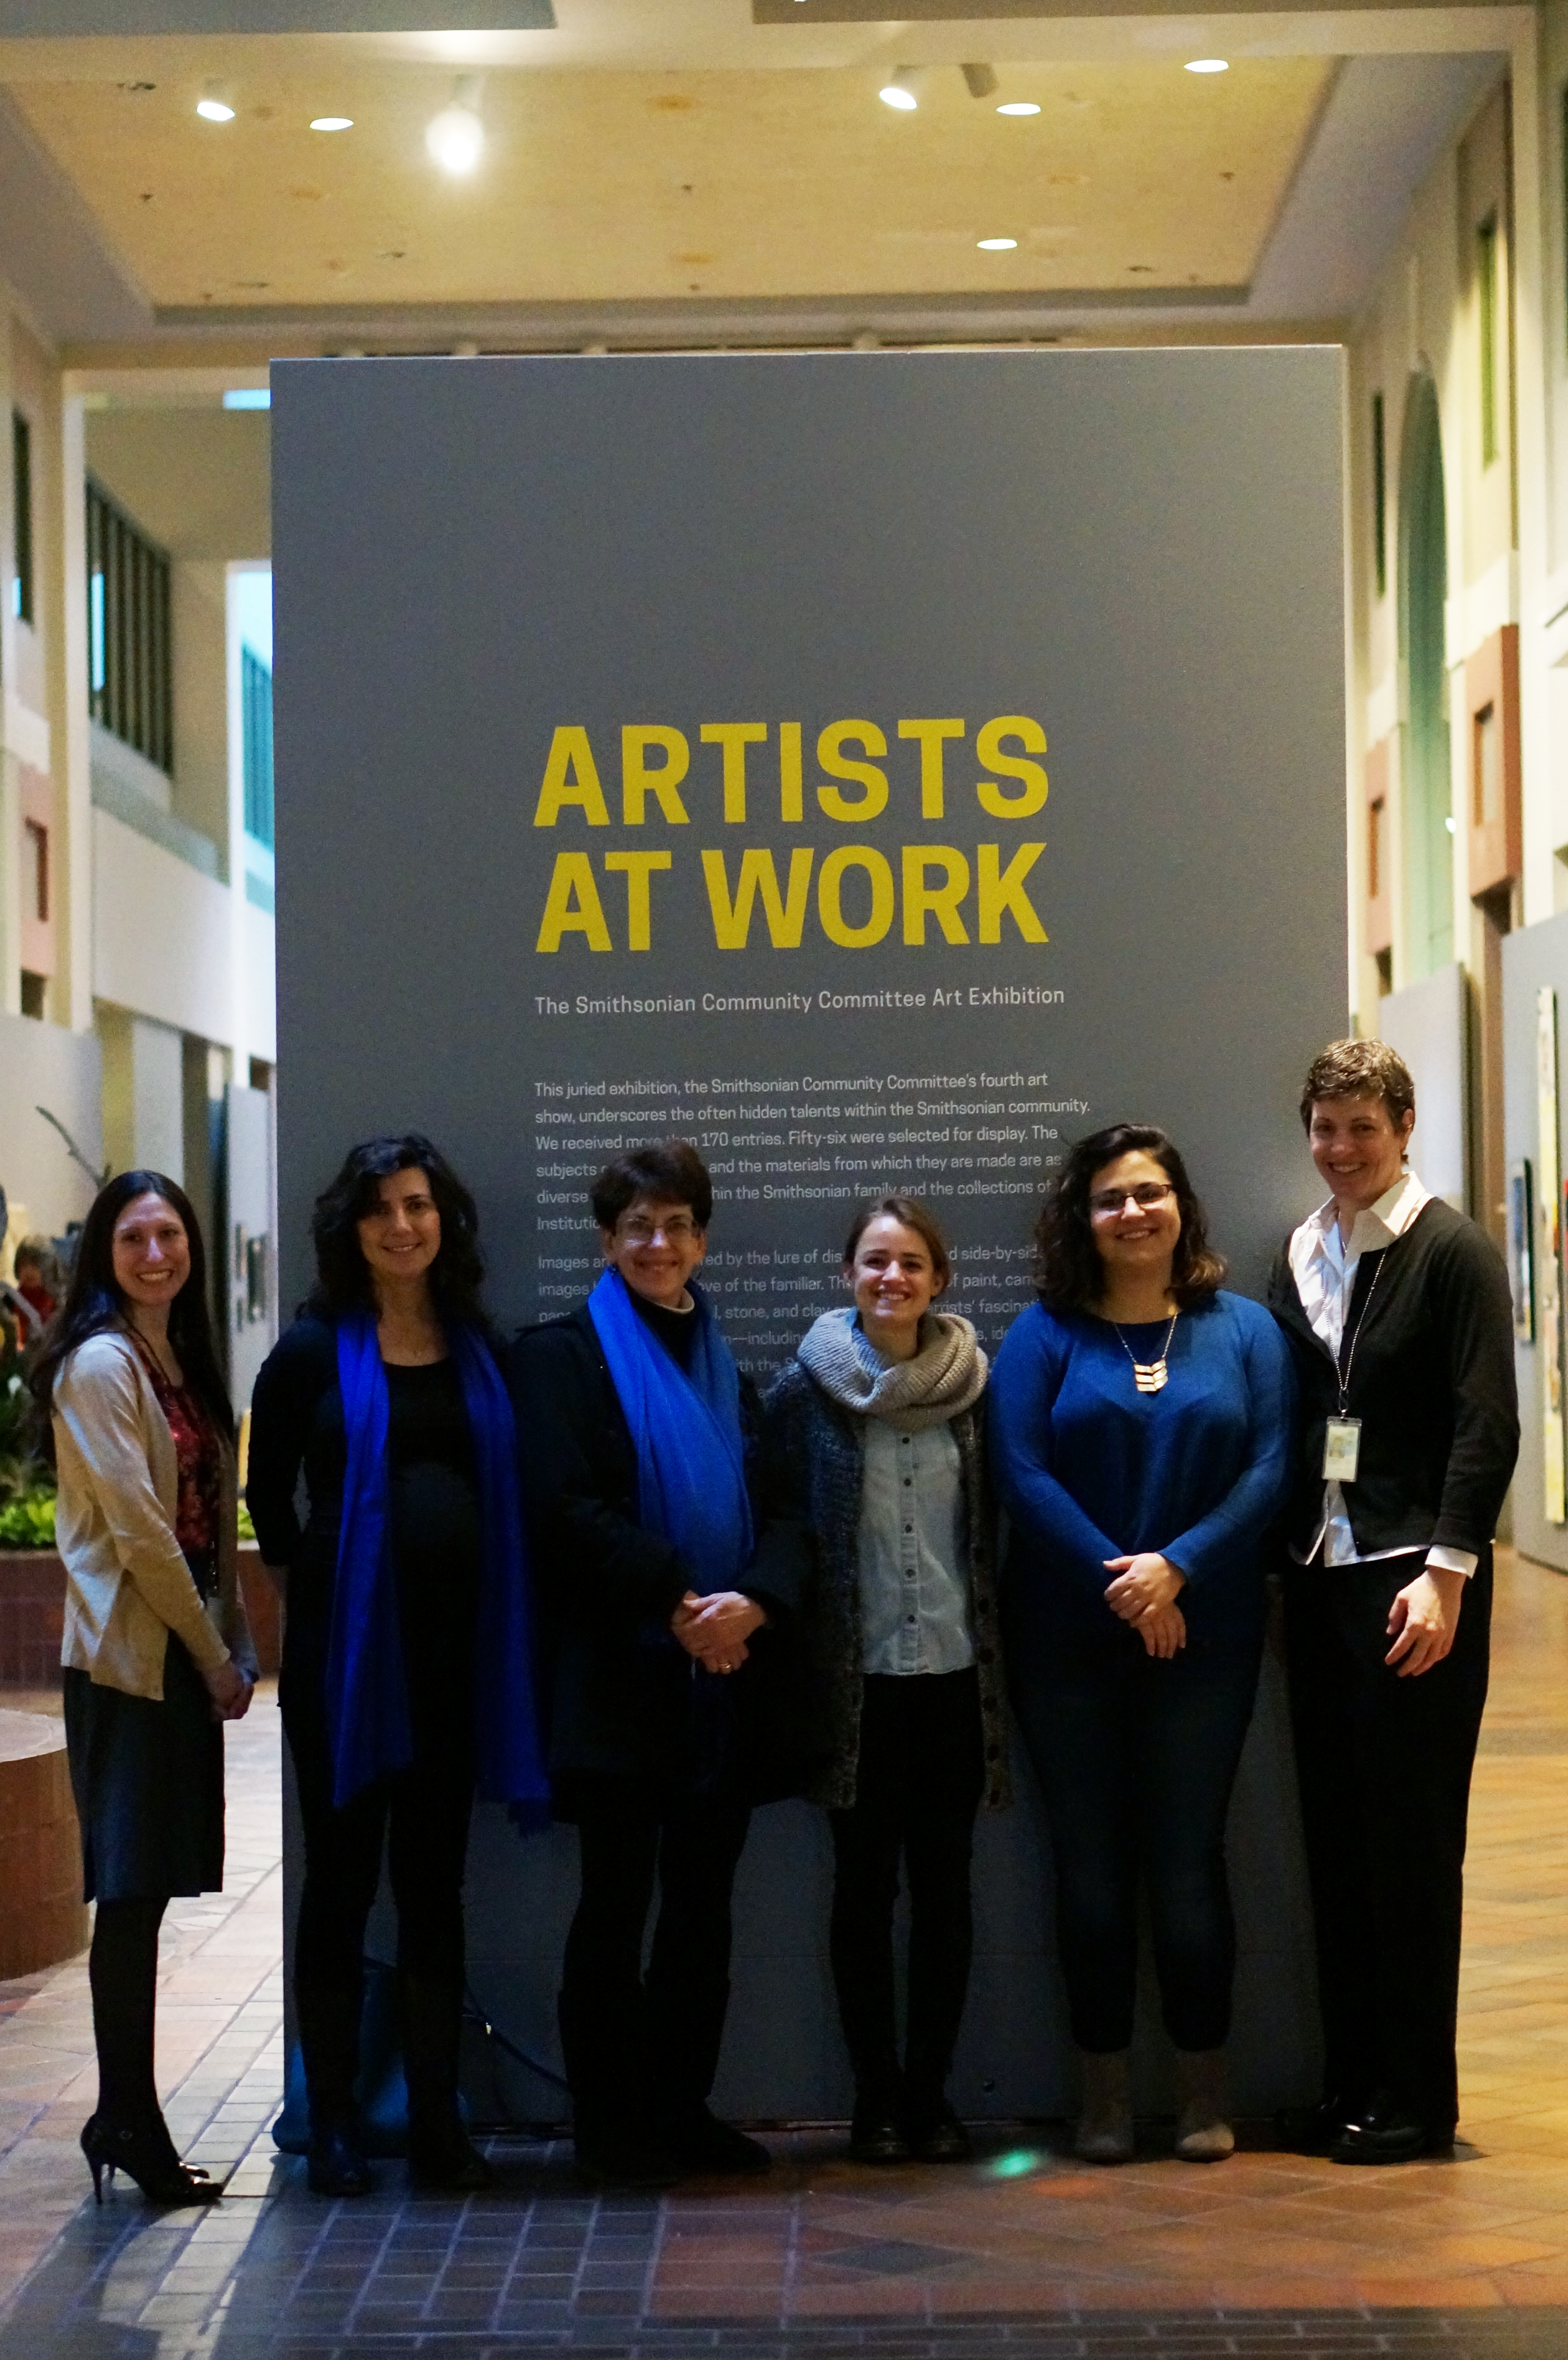
It should be no surprise that OEC is filled with creative and talented people. Our work has helped show off many great works of art. For Artists At Work, not only did we design, edit, and produce the graphics for the exhibition, but we also had a chance to celebrate three of our own artists and the artwork they make on their own time.
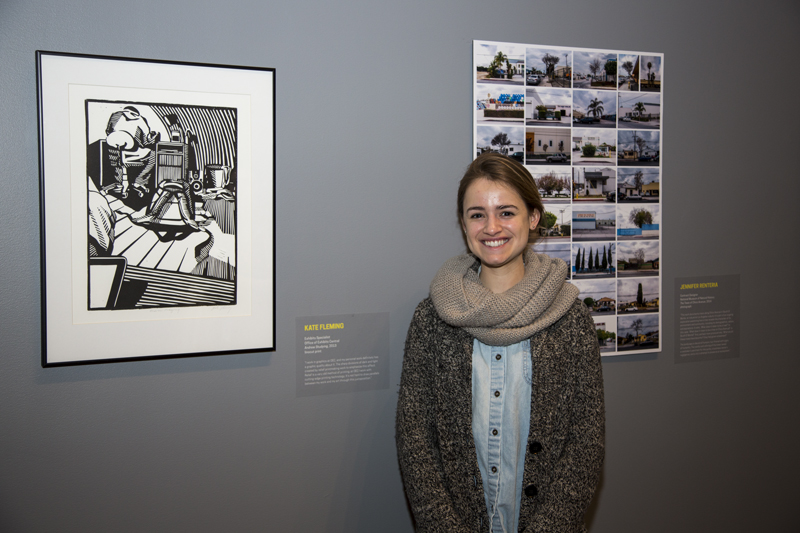
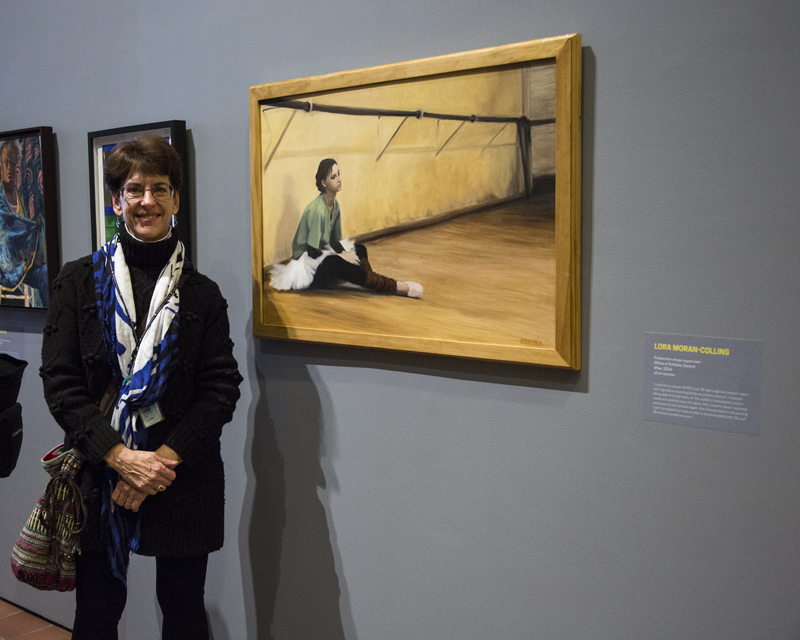
Model maker Megan Dattoria, graphics specialist Kate Fleming, and sculptor and model shop supervisor Lora Moran-Collins were among the 56 artists featured in the Smithsonian Community Committee’s fourth juried staff art show.
Megan Dattoria stands next to her mixed media necklace, Of Disease. She also made the mount to display her piece.
Kate Fleming served double duty on this exhibition. As a graphic specialist, she made the labels for all of the artwork on display… including the label for her own print, Andrew Studying.
Lora Moran-Collins, who makes models and sculptures at OEC, is also a gifted painter. Her painting, After, is oil on canvas.
The OEC Artists At Work team attended the opening reception in February. From left to right: editor Brigid Laurie, exhibit designer Emily Sloat Shaw, Lora Moran-Collins, Kate Fleming, Megan Dattoria, and project manager Betsy Robinson.
Artists At Work is open through May 1, 2015 at the S. Dillon Ripley Center.
Smithsonian Gardens recently opened The 20th annual orchid exhibition, Interlocking Science and Beauty, at the National Museum of Natural History. The exhibit explores “where botany, horticulture, and technology connect.” OEC’s approach to the exhibit components mirrored this interlocking theme.
Staff from Smithsonian Gardens installing a tree behind OEC’s puzzle piece graphic panels.
OEC created detail drawings from Natural History’s design and produced all of the built elements in the exhibition. The team produced the structural components using traditional fabrication methods, but the interlocking puzzle piece panels were machined using the Computerized Numerical Control (CNC) panel router.
Fabrication shared their CNC files with Graphics, so they were able to create graphics that matched the profile of the panels. After the panels were sent to the paint department for finishing, Graphics direct printed the images and text onto the panels using a flatbed printer.
The interlocking pieces feature graphics that were designed to fit the puzzle piece shapes.
Orchids: Interlocking Science and Beauty will be on display through April 26, 2015 at the National Museum of Natural History.
The Hirshhorn celebrated its 40th anniversary by renovating the third floor galleries. The first exhibition in the new space, At the Hub of Things: New Views of the Collection brings together pieces from the museum’s collection spanning themes, generations, and media.
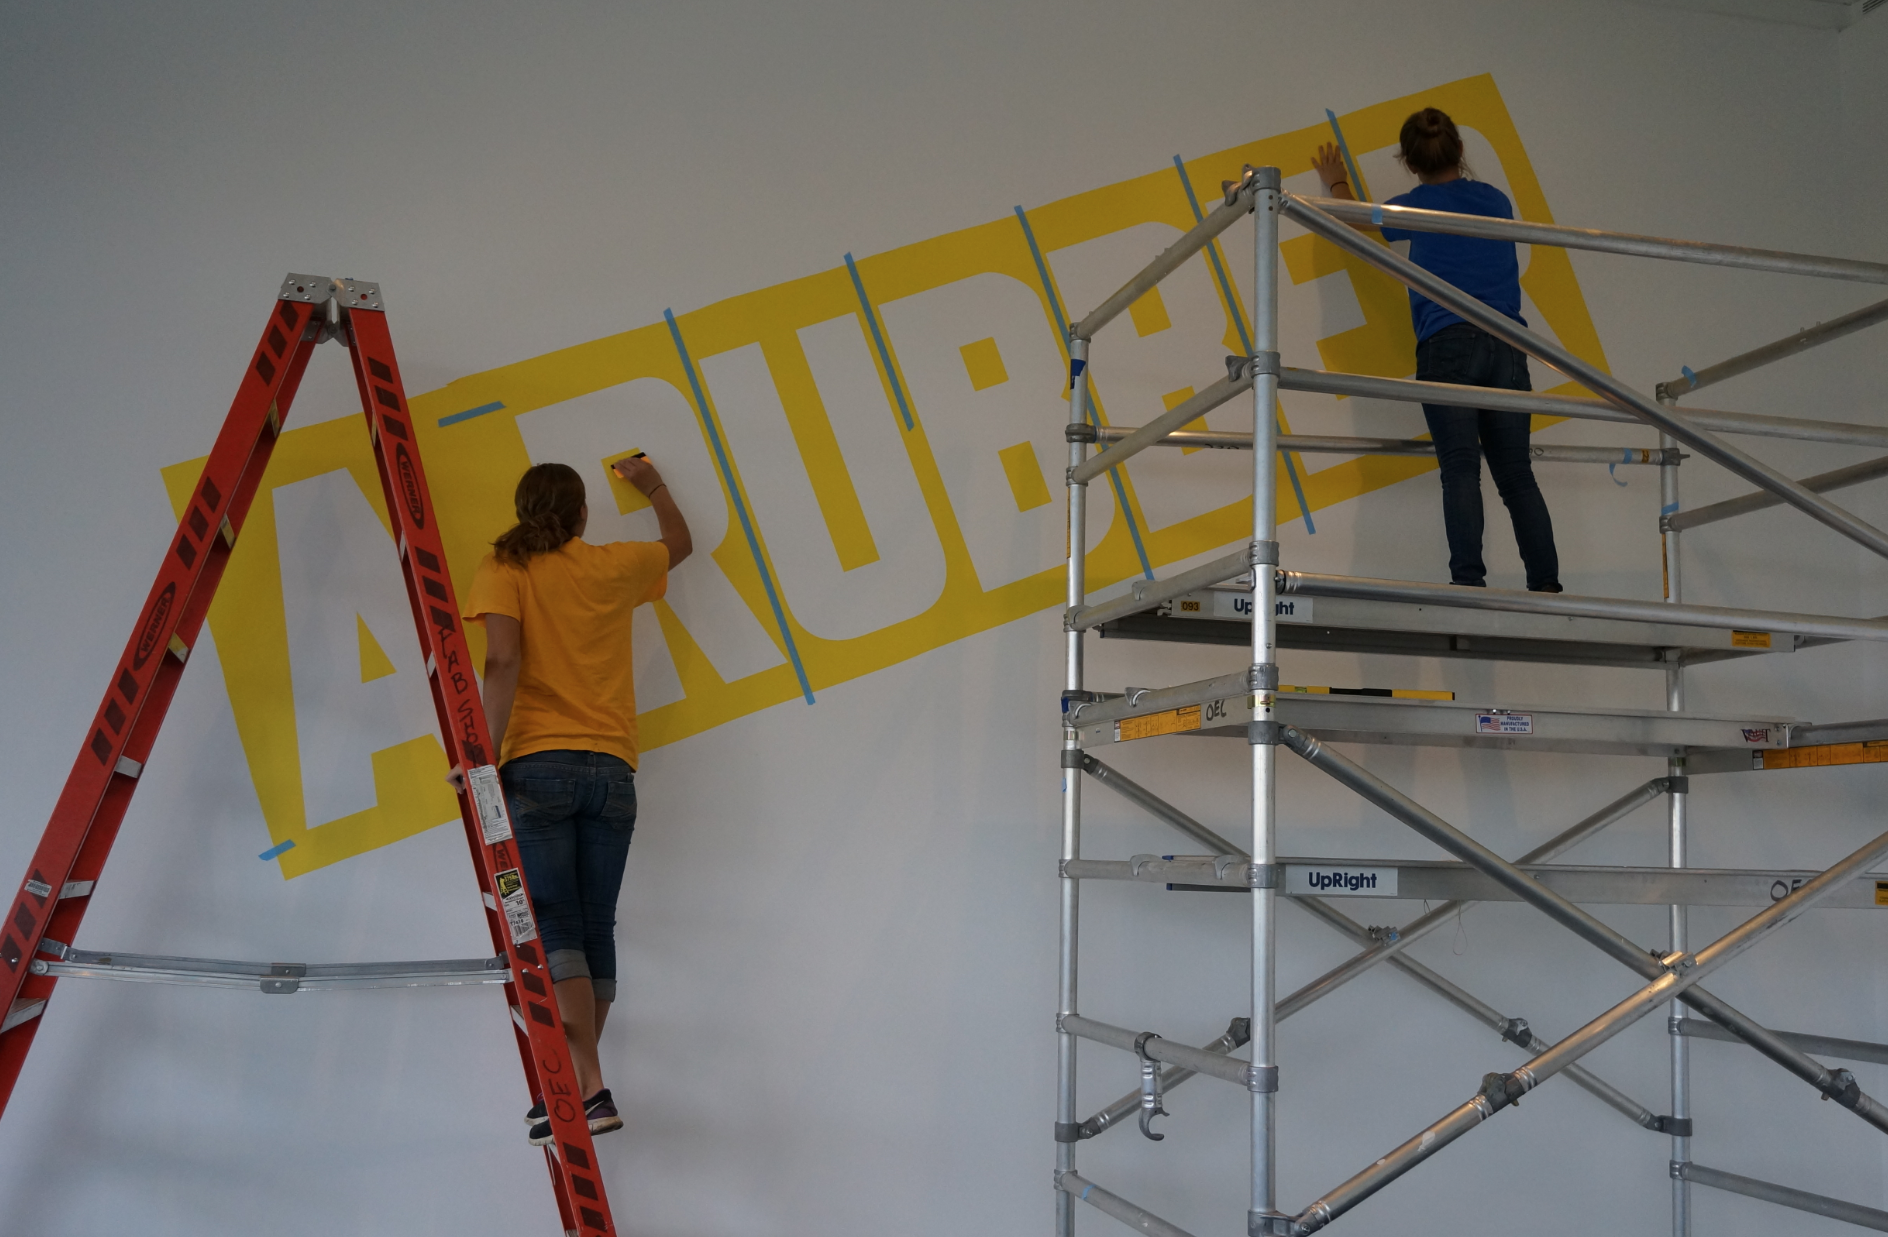
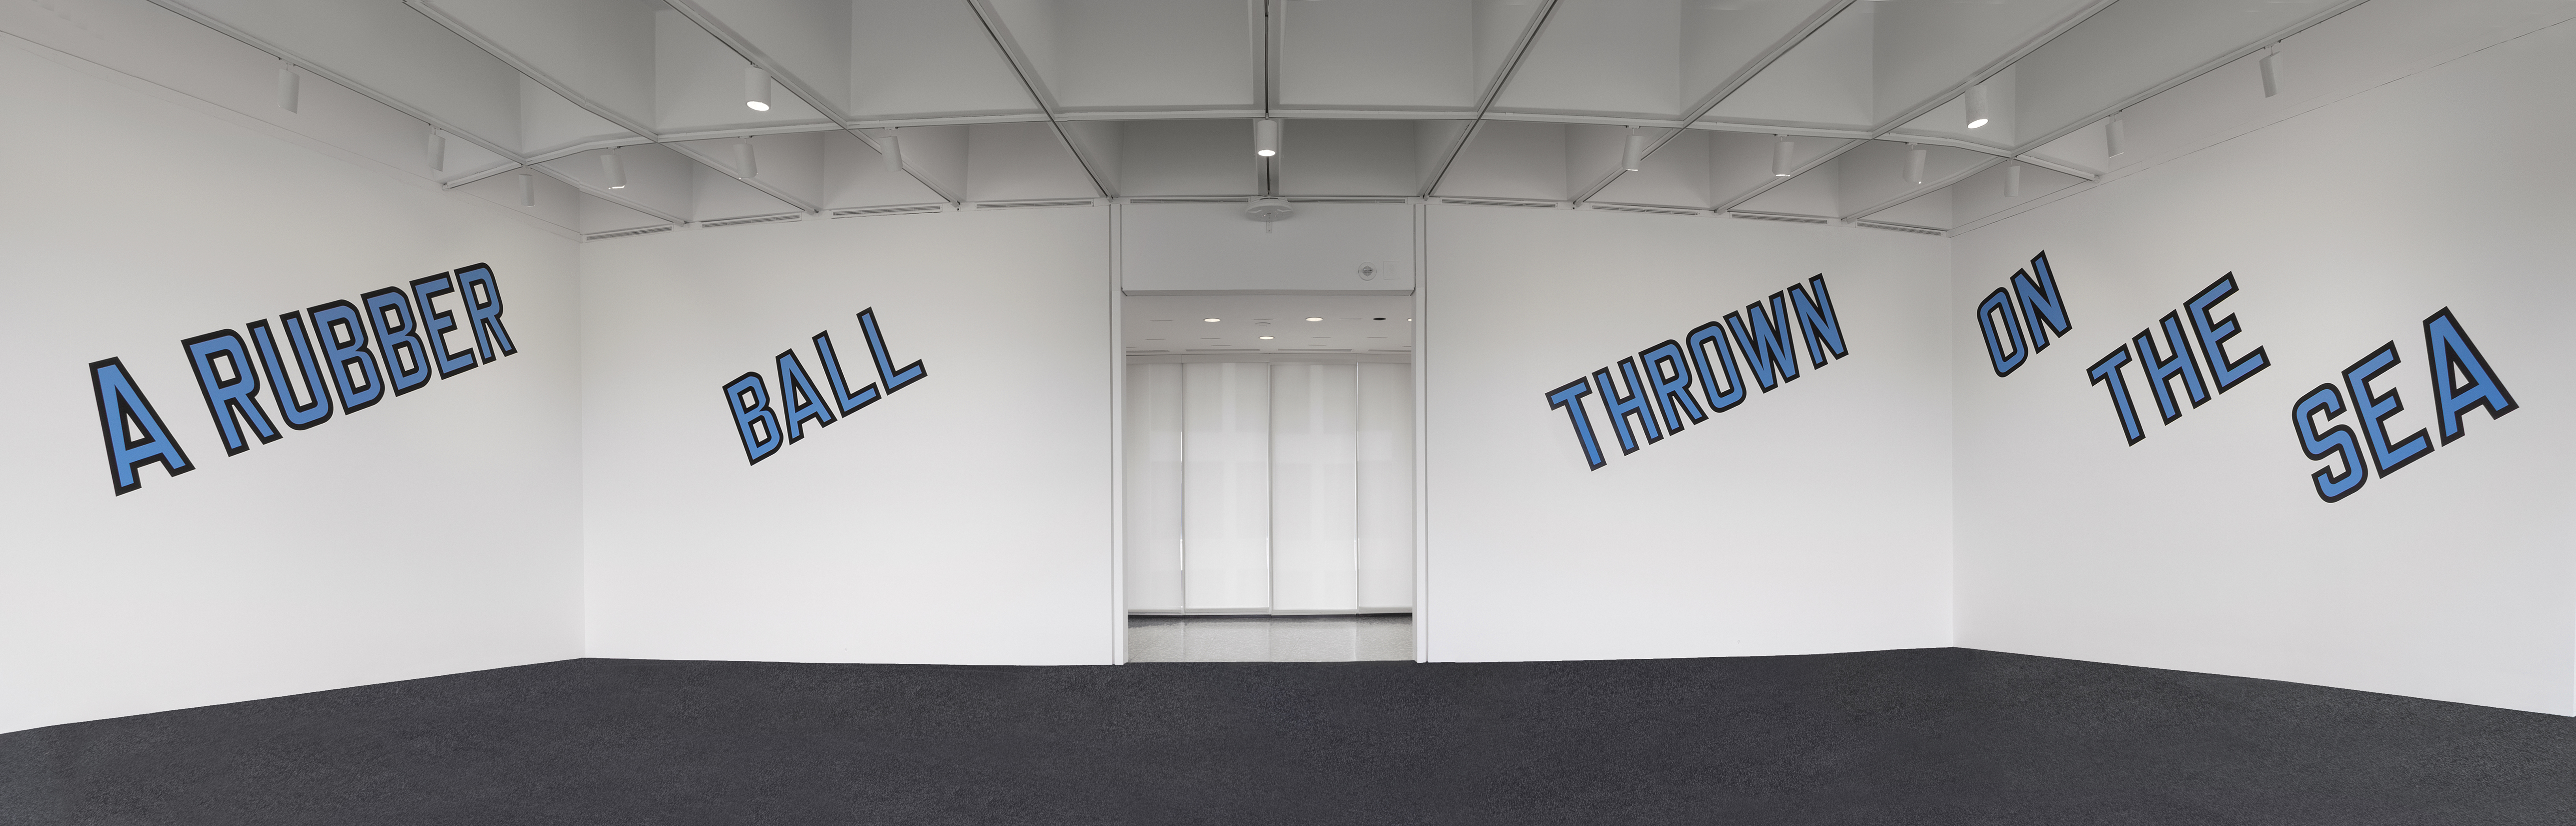
A new iteration of Lawrence Weiner’s A Rubber Ball Thrown on the Sea, produced and installed by OEC, graces the curved walls of the space. Kate Fleming, one of the Exhibits Specialists who worked on the project, explained how the seven words in Weiner’s conceptual piece were applied to the gallery wall.
After testing different painting techniques at our facility in Landover, the team decided to use two different vinyl friskets to paint the blue letters with black outlines. (For those of you who don’t work in art or exhibitions, this is your vocabulary word of the day. A frisket is basically a sticky stencil. It is applied directly to a surface, and because it is adhesive, there is no paint bleed underneath the ‘mask’ like you usually have with a regular stencil, even if you are painting on a vertical surface like a gallery wall.)
We test painted on our own wall at OEC.
The bowed walls of the Hirshhorn created an optical allusion – skewing the way the words appeared as they wrapped around the curves. To combat this issue, the team used a digital level to place the friskets at a 22.5° angle. This precise placement ensured that the words could be viewed the same way from multiple locations in the room.
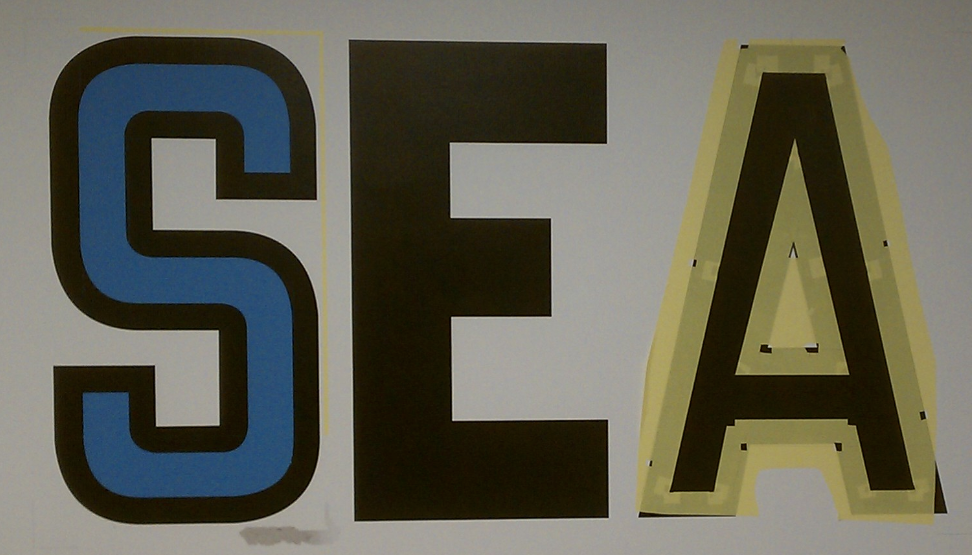
The first step was to back paint the frisket with the wall color. This helped adhere the frisket to the wall and prevented color bleed. Then the first frisket was used to paint the outline in a highly pigmented, high gloss black paint. (As seen in the letter E above.) To achieve a streak-free lustrous finish the OEC team used a minimum of three coats of black.
A second frisket was cut out and placed over the letters, protecting the edges to create the black border. This time the frisket was back painted with black. Then OEC painted the blue inside the outline. (This is the masking over the letter A above.)
Erica Querns, on ladder, and Kate Fleming, on scaffolding, apply a frisket to the gallery wall.
After the vinyl was removed, the team made few touch ups to the paint and the finished work was complete. The crisp, clean lines of this piece are on view in the Abram Lerner Room on the third floor of the Hirshhorn Museum and Sculpture Garden.
Lawrence Weiner, A RUBBER BALL THROWN ON THE SEA, Cat. No. 146, 1969. Installation view of At the Hub of Things: New Views of the Collection at the Hirshhorn Museum and Sculpture Garden, Smithsonian Institution, Washington DC, 2014. Photo: Cathy Carver
On December 12, Cooper Hewitt Smithsonian Design Museum reopened to the public after a lengthy renovation. One of their opening exhibitions, Tools: Extending Our Reach, features 175 objects that have shaped human life. Creating mounts for the ancient artifacts featured in Tools posed some unique challenges.
The mounts needed to display the object without obscuring it. Due to their age, the objects cannot be handled excessively making measuring difficult, and in the case of hand-carved tools, even if we could handle the objects freely, their uneven surfaces aren’t easy to measure anyway.
So how exactly can OEC make these mounts? How do we know that
this
will fit
this?
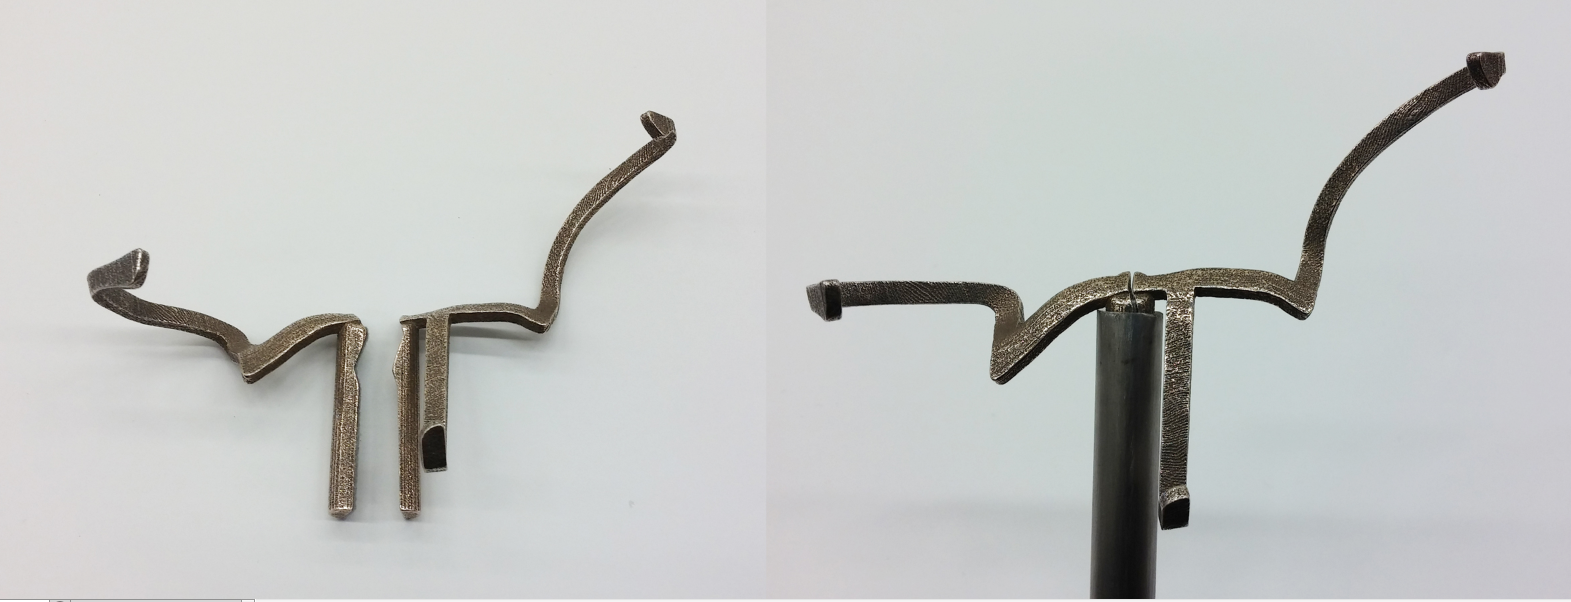
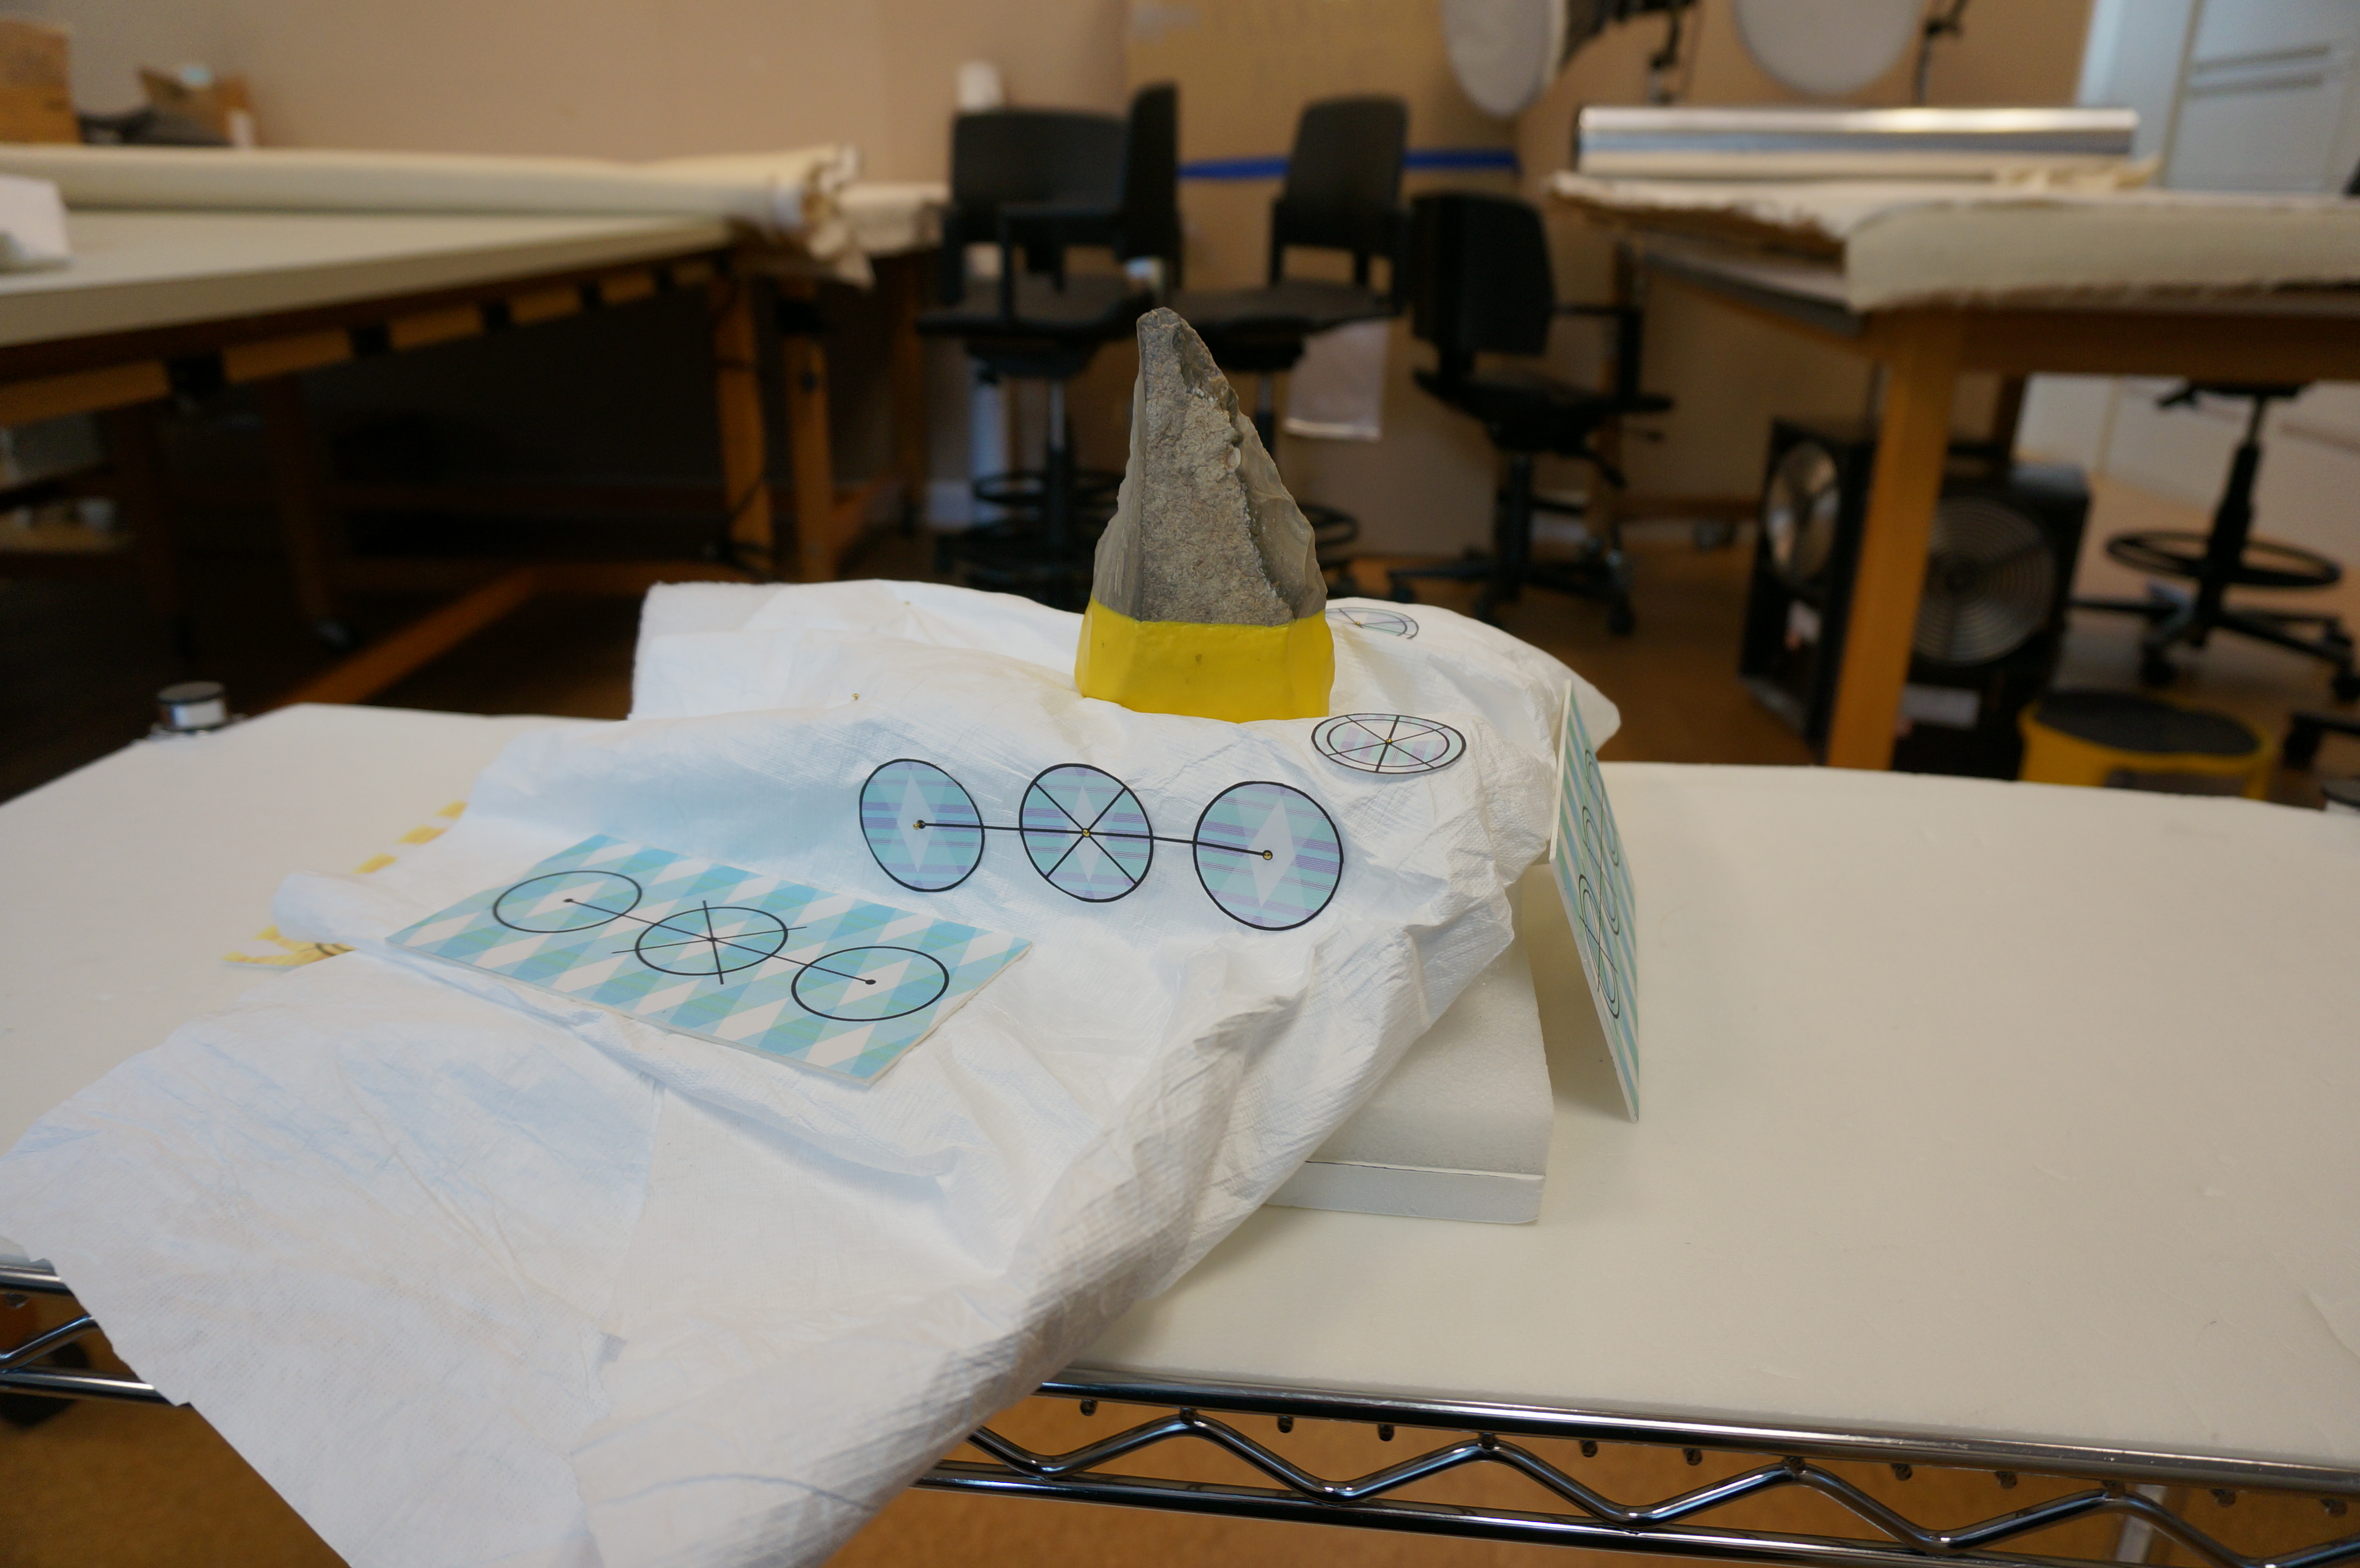
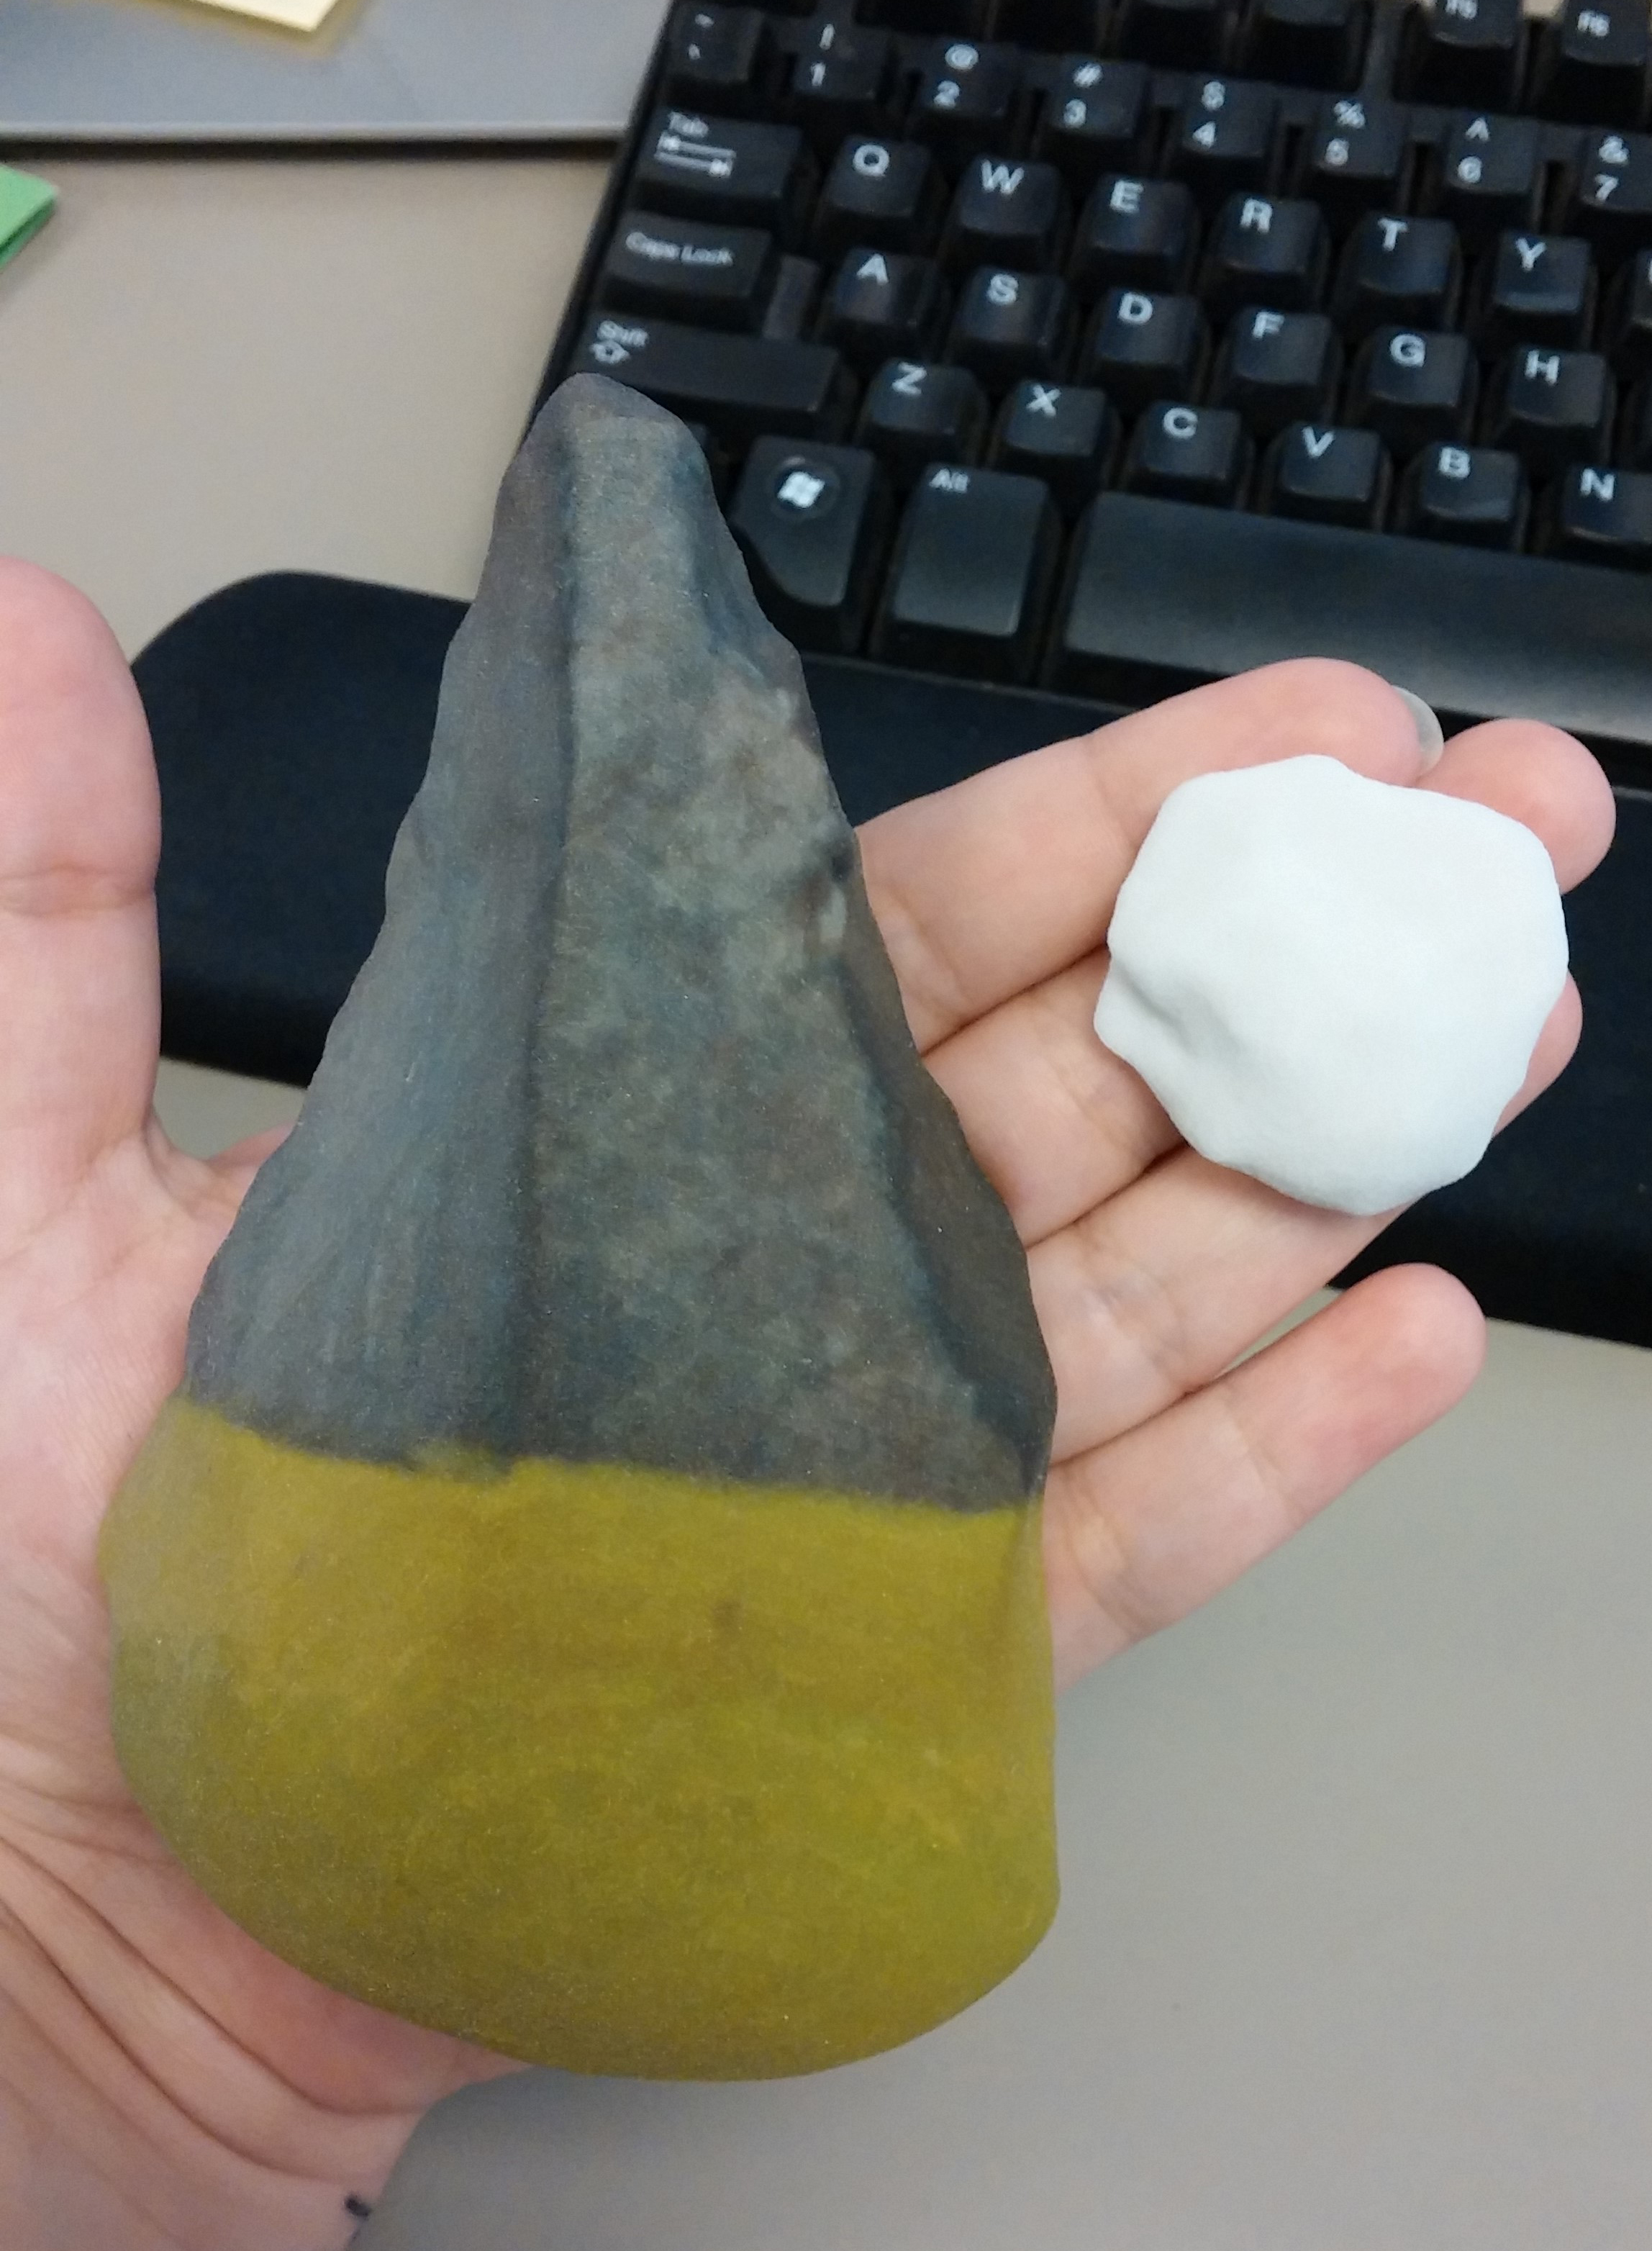
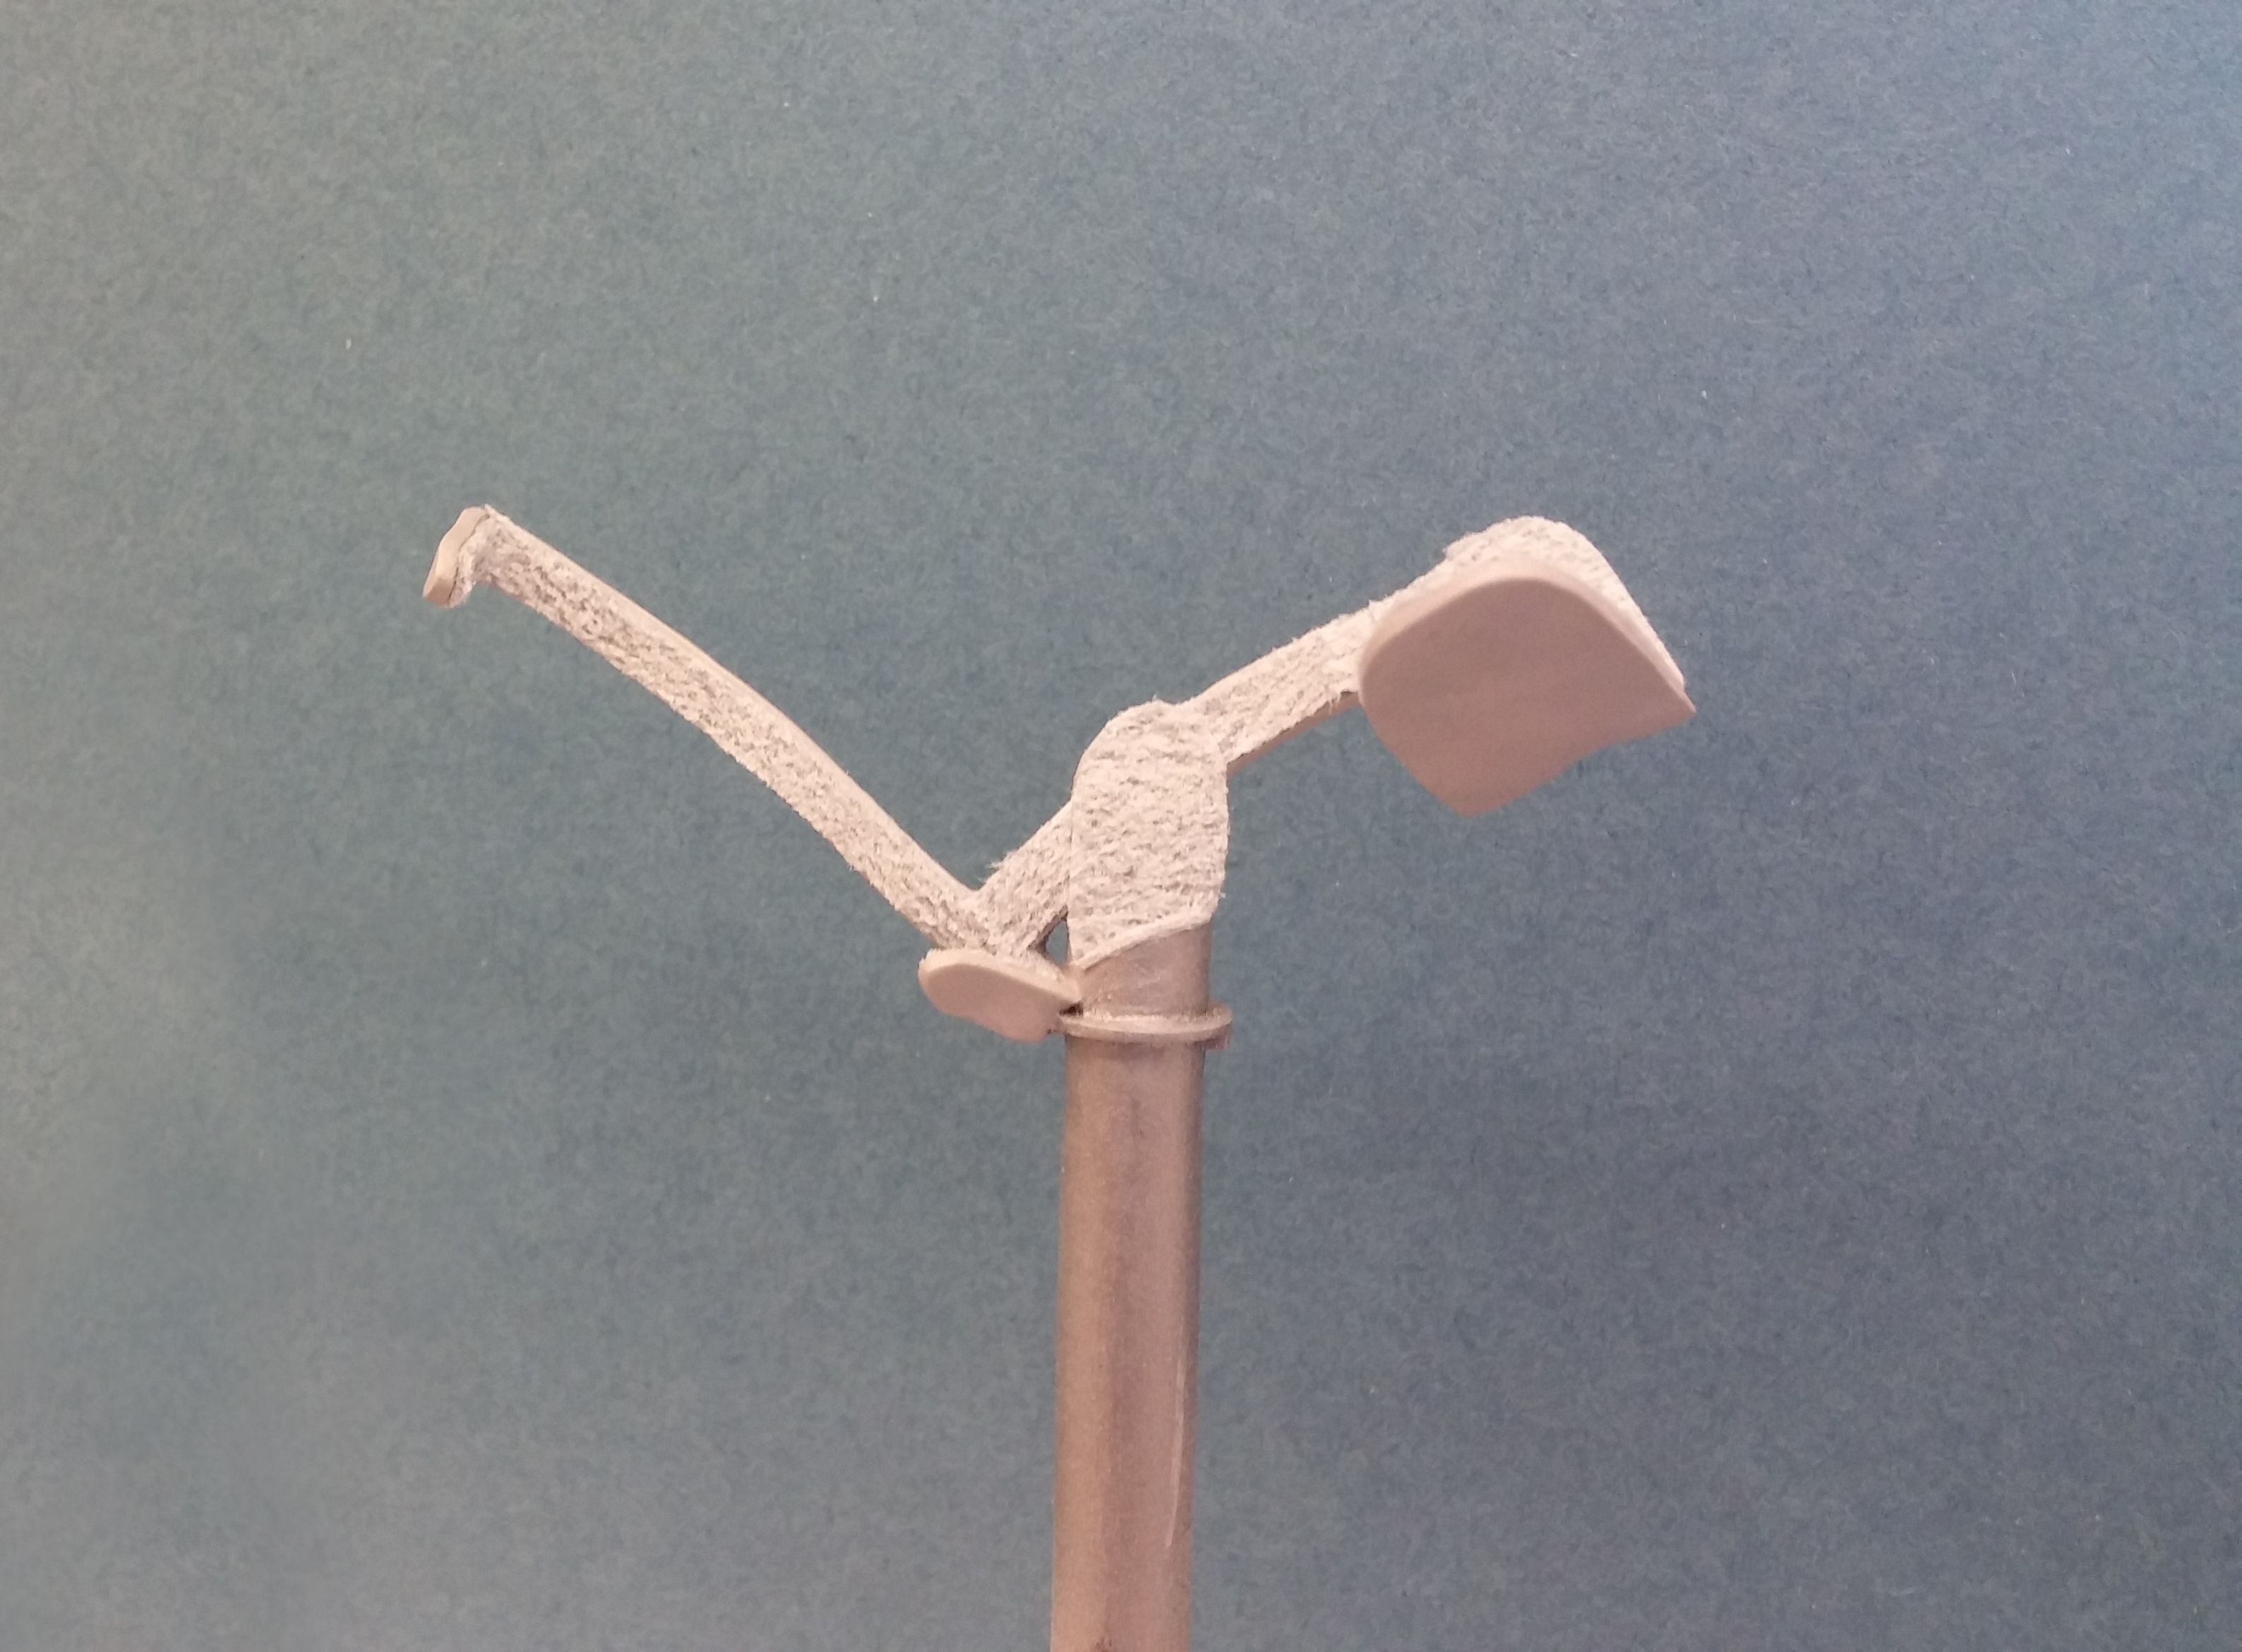
Megan Dattoria, OEC mountmaker and 3D printing innovator, is using cutting edge technology to create custom brackets that are a perfect fit for each object. She was kind enough to explain how she makes custom mounts with minimal object handling. (The object in the photos below is a modern interpretation of an ancient stone tool like the one shown above.)
Megan took 45 rotational photographs of the tool. The targets were used to document the object’s scale.
She used photogrammetry software to create a digital file of the 3D model.
Megan printed a model of the tool and worked with that instead of handling the original object. She could hold it and determine its center of gravity.
Megan virtually placed the tool into the correct display position and built the bracket within the program. The resulting bracket corresponded exactly to the tool’s bumps and crevices.
The digital bracket was printed in wax and then cast in brass. Megan painted and padded the final version.
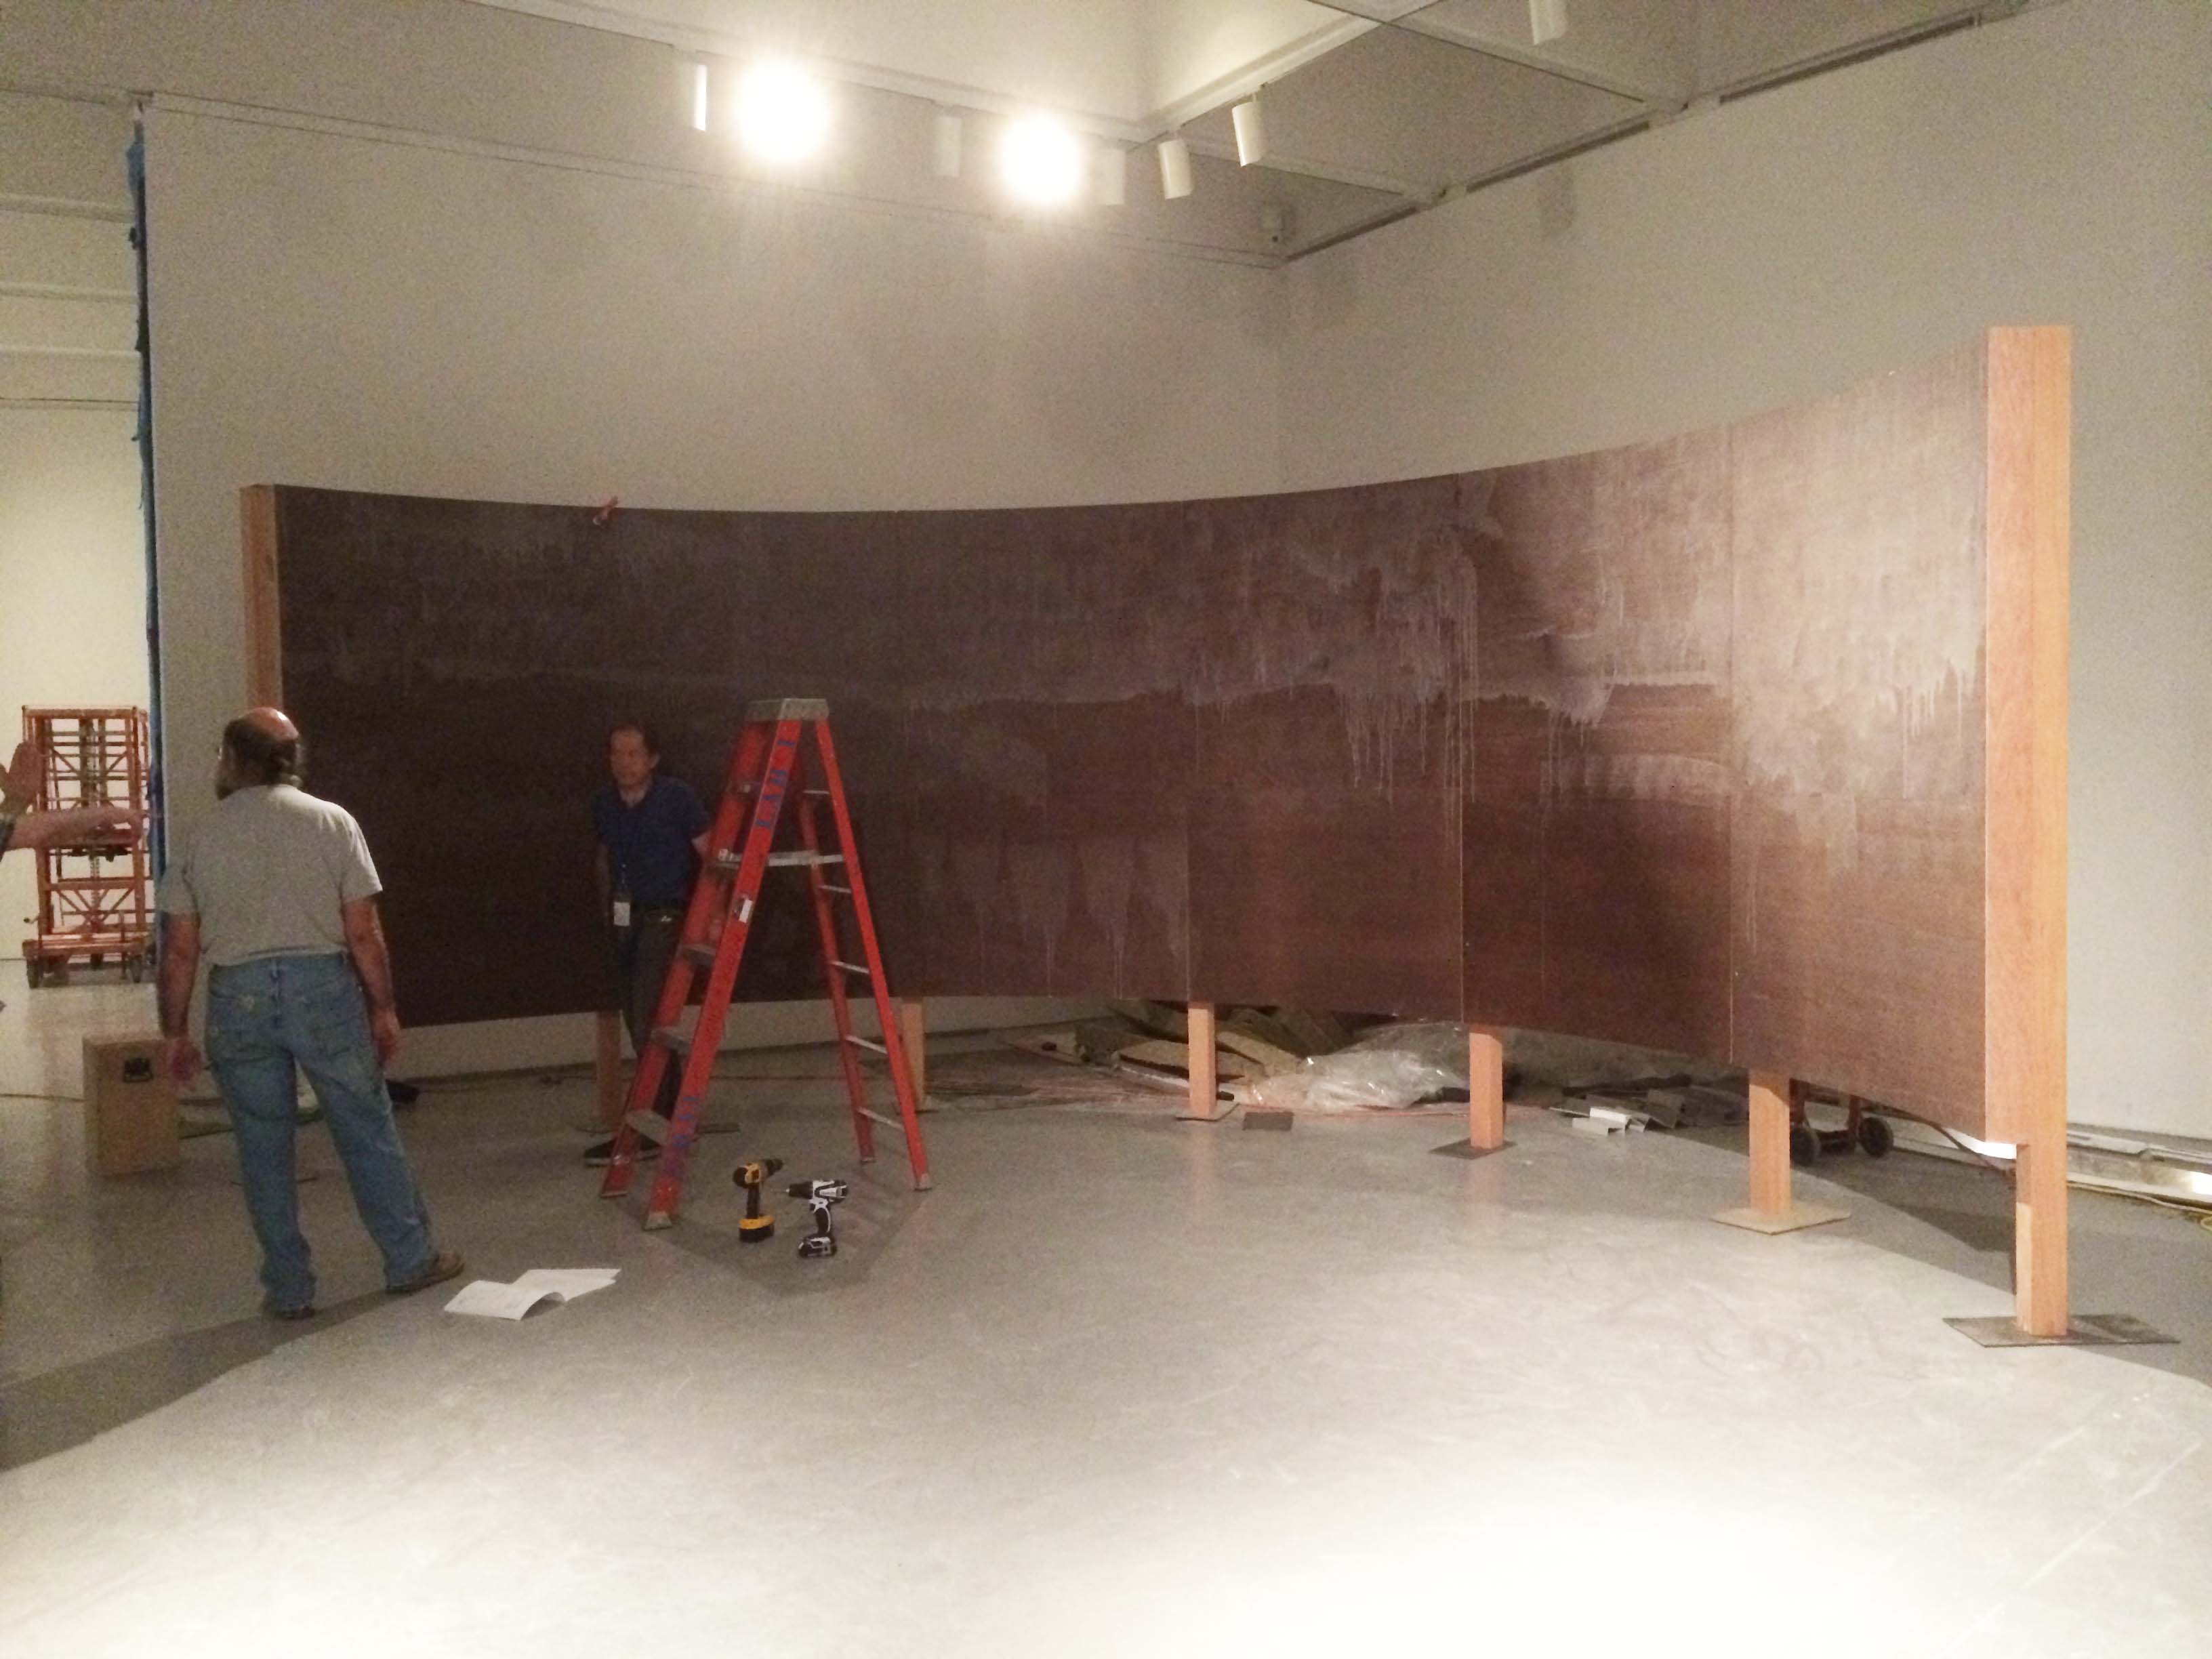
One of the stars of the Hirshhorn’s new exhibition, Days of Endless Time, is the American debut of German artist Clemens von Wedemeyer’s Afterimage (2013). OEC fabricators Adam Bradshaw and Enrique Dominguez, along with intern Colby Styskal and volunteers Juan Lucas and Neal Falanga, built the semicircular screen used to show this work from nine separate curved panels.
OEC staff installs the curved screen for “Afterimage.”
OEC used CAD/CAM programs to lay out and cut the plywood ribs. The seams required three blind panel connections. The connections were skinned with bending ply on the front and back, and the screen was raised off the floor with 4×4 posts.
Luan plywood was used on the back of the screen to create a “raw shipping crate” appearance. The plywood was coated with a clear fire retardant finish. Unlike the raw look of the back, the front surface was laminated in phenolic paper. This covered any imperfections and created a smooth screen for the projection. After the screen was anchored to the floor, the seams were caulked and the face was painted with white projection screen paint.
The back of the screen resembles a shipping crate.
Afterimage and the other 13 artworks featured in Days of Endless Time will be on display through April 6, 2015.
Thomas Jefferson’s tombstone has led an interesting life. In 1833, 7 years after his death, the tombstone was made to his exact specifications and placed in the graveyard of his home, Monticello. The years, the weather, and even vandals took a toll on the tombstone. Within 50 years, it was in terrible condition. A copy of the grave marker was made for Monticello and Jefferson’s family gave the original to the University of Missouri.
Unfortunately, in 1892 a fire severely damaged the tombstone. Sadly, it was not repaired very well at the time.
In 2014, however, the tombstone’s luck began to turnaround. The Smithsonian Museum Conservation Institute (MCI), in Suitland, MD was able to treat the tombstone. While it was at MCI, OEC paid the marker a visit and photographed it – many, many times – in order to make 3D replicas. Carolyn Thome went MCI to digitally capture the tombstone using photogrammetry.
Carolyn took over 200 photographs of the tombstone. The photos were uploaded to the “cloud” for photogrammetry software processing.
Chris Hollshwander used computer aided machining (CAM) software to create tool paths to drive a computer numerical control (CNC) router. He used these tools to cut a master pattern in polyurethane model board.
Once the pattern was created, a silicone mold was made to cast the replicas. Each replica was made of a material suited to its intended use. The replica displayed outdoors on the original granite obelisk was cast in glass fiber reinforced concrete (GFRC), a material that has a stone-like texture. The other replica is used for educational presentations. To keep it lighter and easier to handle, it was cast hollow in glass fiber reinforced polyurethane resin.
At this point, it was Erin Mahoney’s turn to tend to the replicas. She used a combination of faux stone and faux marble techniques to paint them, matching the color variations of the original Vermont marble.
Erin paints one of the replica tombstones.
Finally, Chris Hollshwander applied a UV protectant polyurethane clear coat.
Chris sprayed a protective coating on the replicas before they were shipped to the University of Missouri.
The original tombstone, restored…
… and the two replica tombstones. Could you tell the difference?
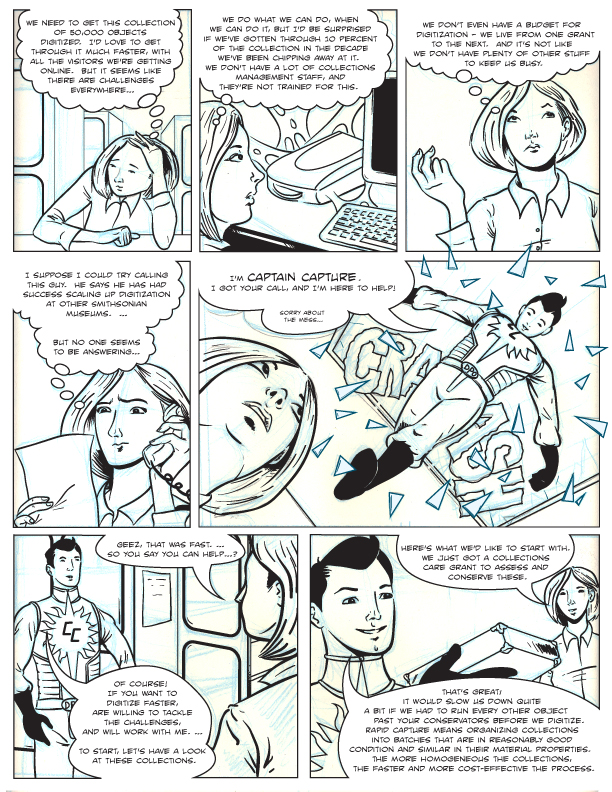
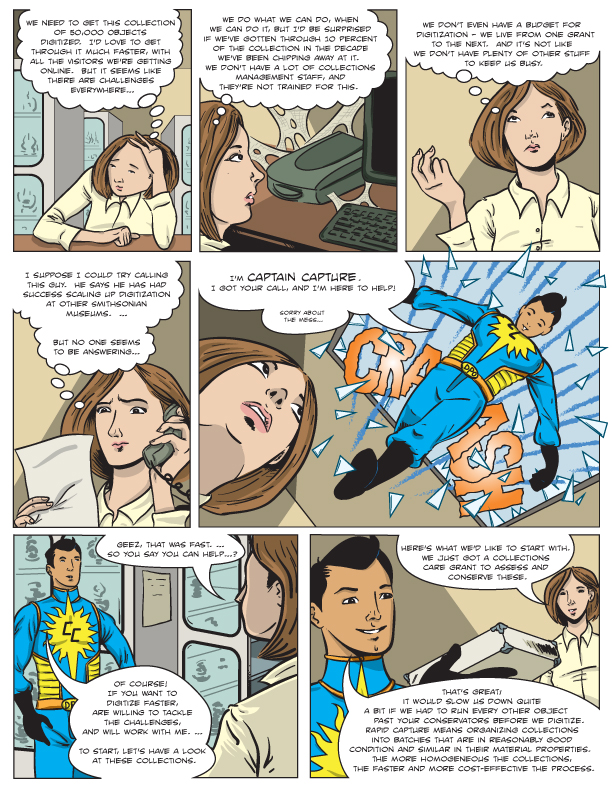
Meet Captain Capture, the hero of the Smithsonian’s Digitization Program Office!
Like all great superheroes, he has an origin story.
He was born in the wilds of Landover, Maryland, in a secret lab owned by the Smithsonian. Well, maybe not… but he was created and drawn by Evan Keeling, an OEC graphics specialist and comic book artist who took on this endeavor. The comic explains how the DPO rapid capture process works, and how it can benefit collections at the Smithsonian. DPO recently launched the Captain Capture comic book at the 2014 Digitization Fair.
Evan was kind enough to share with us mortals how he brings a comic page to life using pencils, inks, and digital media.
After reviewing DPO’s script, Evan outlined the potential frame layouts in pencil.
He refined his drawings….
…and added the text.
After the text was in place, he inked the page to provide definition and establish the mood.
At the end of our hero’s journey, color is applied and BAM! Captain Capture is here to save the day…and your collections.