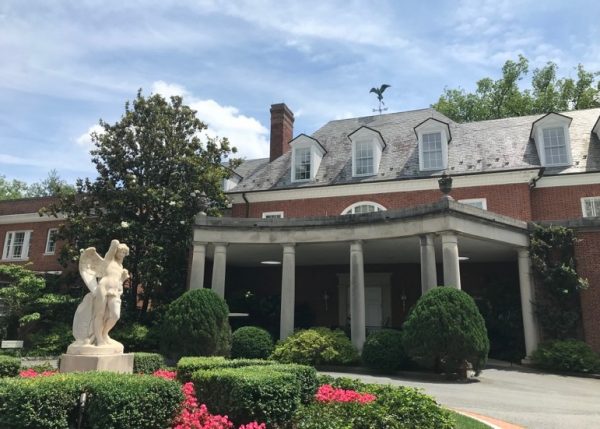
The Great Hall is one of the most impressive spaces in the Smithsonian's Castle, which was constructed between 1847 and 1855, using architectural elements that are reminiscent of the late Romanesque style. The Great Hall's expansive width and dramatic height serve to make it a striking room, and its massive arcades–comprised of columns painted to resemble stone, which support imposing round-headed arches–run the length of the 125'-long hall.

The Great Hall in the Smithsonian Castle
When the bases of the arcades' columns recently needed to be refurbished, Richard Stamm, Keeper of the Castle Collection, requested that Walter Skinner, the Office of Exhibits Central's (OEC) painter, undertake the project. The columns, which are structural elements made of brick, are covered with ornamental finishes that are divided into three segments: a base–the bottom section; a shaft–the center section; and a capital–the top element. The base, itself, is made up of two parts: the lower portion is black granite, while the rounded moldings above it are made of molded plaster, painted to resemble granite. The shaft is also comprised of plaster: the flat part of the column is plaster on board; the rounded sections are molded plaster. The capitals, as well, are made of molded plaster. While the capitals were found to be in good condition, Skinner was asked to repair and repaint the columns' bases, and to touch up their shafts, where necessary.

View of one of the columns in the Great Hall
Skinner's first step was to examine the bases to define the extent of the work, and to determine the best way to proceed. The rounded moldings on all of the bases needed to be refinished, and a number of black granite corners which had gotten broken off over time, needed to be reconstructed. Additionally, the shafts, which are currently painted to resemble multi-colored layers of marble, needed to be repaired and refinished, wherever damage had occurred.

The lower section of the column's base is black granite; the rounded moldings
above it are plaster that has been faux finished to resemble granite; the
shaft of the column is plaster that has been faux finished to resemble
various shades of marble
Using color sample books, Skinner carefully matched all of the columns' base and shaft colors on-site, and then took the information back to his shop to begin planning the project. After extensive color matching, testing, and prototyping, Skinner achieved the results that he wanted. He then took his painting materials to the Castle to perform a test on one of the columns for review by Rick Stamm.

Skinner prepares a prototype of one of the shades of marble found on the
Great Hall columns

Skinner's prototypes for the Great Hall's bases and columns
Because the Castle is an historic structure, all work completed at the building must be commensurate with the structure's style. Additionally, the work methods that are employed must conform to health, safety, and environmental regulations. Latex paints, for example, which are water-based and have a lower petroleum content, as well as lower VOC (volatile organic compound) ratings, have generally replaced oil-based paints. VOCs are natural or synthetic compounds that vaporize into the air, some of which have a negative impact on air quality. Using "Low-" or "No-VOC" latex paints can diminish the amount of harmful VOCs discharged into the atmosphere, and can also reduce the need for toxic solvents for paint cleanup, since latex paints are water soluble.
Also, because the building is open to the public, all of the work had to take place at night, after the museum had been closed and locked for the day, and it had to be completed before the building reopened the following morning, so that the Castle's daily operations would not be disrupted. Skinner began at 6:00 p.m., and worked for approximately ten hours each night, for three weeks.
The rounded moldings above the lower granite bases required the most work, and so Skinner decided to begin there. He used a 3-M masking machine to cut masking paper in 12" strips, which he adhered to the lower base and column shaft with blue, low-adhesive tape to protect the areas surrounding the painting site. He also carefully covered the Castle's carpeting with canvas cloths. Next, because the light levels in the Great Hall are rather low and Skinner was working at night, he set up four portable halogen light stands, which he moved from column to column as he progressed.
As Skinner noted, "The most important consideration when undertaking a painting project is the preparation, which is 80% of the process. Covering floors and furniture; taping off areas that are not to be painted; assembling the correct materials; testing and prototyping; and creating sufficient lighting, ventilation, and temperature conditions are critical, and determine how successful the painting results will be." Skinner's mastery of painting comes from his three years of training at the District Council 51 Allied Trade Union Apprenticeship Program, and his subsequent 20 years of work there. His training incorporated all applications related to designing and decorating a wall, including painting, faux finishing, wood graining, plastering, staining, wallpaper hanging, dry wall finishing, and stucco work.
Once Skinner had prepared the painting site, he began refinishing the rounded plaster moldings by repairing any holes that existed, using "Easy Sand 5" Quick Set, which is a solvent-free joint compound, or hardening agent, that dries in five minutes. He used a sanding sponge with fine- and medium-coarse grit sandpaper to sand the moldings to make sure they were smooth, and then applied a coat of latex primer. Reconstructing missing granite corners on the lower bases required two coats of Quick Set which he wet-sanded to form into the correct shape.
The next step was to paint the rounded moldings and repaired corners with a base coat to establish the background color of the granite. While the base coat was still tacky, Skinner integrated additional colors to achieve the appearance of natural-looking granite. He used three different trays containing three different paint colors–light gray, dark gray, and beige–as well as small amounts of white and black. Each paint color was mixed with a latex clear glaze, which made the paint more translucent; the mixture equalled 50% paint and 50% glaze.
Skinner then used an artist's eye to hand-paint the bases to create the appearance of granite by applying the different colors in varying gradations across the surface of the moldings. Following that, he did "color spotting" which consisted of adding highlights in whatever color was predominate on that particular base to achieve a more natural-looking surface. Because the glaze thins the paint, it dries fairly quickly. After one hour, Skinner was ready for the final step, which was to apply a coat of "Stays Clear" gloss–a durable, hard, clear, fast-drying finish that provided a protective layer and created a polished granite effect. Once completed, each base was allowed to dry overnight. Skinner finished three to four bases per night before putting his equipment and brushes away in preparation for the reopening of the museum each morning.

View of a column base
Skinner maintains a large collection of brushes which he has assembled over many years. Ranging from 1/4" artist's brushes, which can be used for painting veins in marble, to 4" brushes, which can be used for staining decks, the choice is driven by the parameters of the job. When using oil-based paints in the past, for example, he preferred to use a Chinese natural bristle brush, which was harder and more pliable; it did not absorb as much paint. When using water-based paints, however, it is better to use a nylon acrylic brush, which is much more absorbant. Because oil paint could travel further, it was unnecessary for the brush to absorb a great deal of paint; one gallon could cover 700 to 800 square feet. With latex paint, on the other hand, the brush must be able to hold more paint in order to achieve the same coverage; one gallon of latex paint covers approximately 400 square feet. Skinner also prefers to use a square-cut brush, rather than one with bristles cut on an angle, although it generally takes more wrist control to master, especially when painting corners.
According to Skinner, taking care of the brushes is crucial, with cleaning them properly being the most essential step in the painting process. The brush must be washed thoroughly after each use with warm water. The next step is to spin the brush by rapidly rolling the handle between both hands a few times–with the bristles pointed down–to dislodge most of the water. While it is wet, a wire comb should be used to straighten the bristles and smooth them back into place. The brush should then be stored in the manufacturer's cardboard wrapper in which it came; it can be put into the wrapper while it is still damp.
After Skinner had completed the bases of the Great Hall columns, the next phase of the Castle project was to repair and touch up the shafts, which are painted to resemble various shades of marble. Skinner followed the same process: taping off, and preparing the painting site; repairing damaged areas; and carefully–but randomly–blending a number of colors to simulate the natural appearance of stone. While the Great Hall has undergone many transformations over time, the current color range for the marbles consists predominantly of beige, gray, and black. In some cases, it was necessary to apply latex paint on top of older oil-based paint, which made the project more complex since the consistency of the two paints is very different. It is sometimes difficult for a water-based paint to adhere well to an oil-based one, for instance.

Detail of one of the faux-finished marble columns
Once the work in the Great Hall was completed, Skinner was also asked to do touch-up painting in the Schermer Hall, also known as the "West Range." Constructed in the mid-19th century, during a period of great popularity for "revival" styles, the Castle's design incorporated references to medieval architectural elements. The "Lower Main Hall" or "Great Hall" as it is known today, for example, located in the central block of the Castle, was patterned after the communal room that was often found in castles in England and France during the 11th through 13th centuries; the eastern and westernmost sections of the building, on either side of the central block, were laid out as wings that were attached to the central block by "connectors" or "ranges." The Castle's West Range is currently used for exhibits and to highlight the Castle collections. Similar to the Great Hall, it contains impressive arcades, along with dramatic ceiling heights.

The Schermer Hall or "West Range" of the Smithsonian Castle with a view
of the "West Wing" through the open doorways
Followng the same process that he used for the Great Hall, Skinner first conducted extensive color matching on the columns, as well as the perimeter walls. After preparing the painting site, he repaired damaged areas, sanded, and repainted, ensuring that his technique and methods were appropriate for the historic structure. Because the perimeter walls are so tall, it was not feasible to repaint them from floor to ceiling. Instead, Skinner repaired damaged sections, and then "faded" or "feathered" the paint that he applied to those areas so that it would blend in with the existing paint and be unnoticeable.

View of a tri-colored column in the Schermer Hall
"One of the most interesting aspects of this field of work," Skinner said, "is that every job is different from the last. I am inspired by great buildings, and get a lot of satisfaction from experimenting with various processes to determine which one is best for each particular situation. Being able to work on-site in a wide variety of locations also keeps the job exciting, and I like having the opportunity to produce something that people can enjoy."
Background information on the Castle is from The Castle: an Illustrated History of the Smithsonian Building by Cynthia R. Field, Richard E. Stamm, and Heather P. Ewing (Washington and London: Smithsonian Institution Press, 1993).
photo credit: editor