Have you ever walked past an exhibit graphic that seemed to move? Or maybe the image suddenly shifted? Your eyes weren’t playing tricks on you … the graphic was playing a trick on your eyes.
These types of graphics are known as lenticular prints.
What Are Lenticular Prints?
Today’s lenticulars aren’t the moving image stickers you used to get at the doctor’s office as a kid (or adult—no judgment here). You know the ones: if you swiveled it a bit it looked like She-Ra was raising her sword, or a transformer was … transforming. Well now that same concept makes things that do this:
2D Print, 3D Effect
One of the advantages of lenticulars is that visitors can get a nice pop of 3D or animation without needing any additional equipment. As cool as everyone looks wearing those 3D glasses, it’s a bit of waste to supply those for one panel. Lenticular prints simulate motion and/or dimension using specially fabricated two-dimensional prints.
How do the 2D prints make it look 3D?
It’s called stereoscopy. It’s a visual effect created by providing slightly offset views to both of your eyes at the same time. When your brain mushes (technical term) the two visuals together, you see the combined image with additional depth and volume. In other words, your brain takes Image 1 and Image 2 and turns into a much more awesome optical illusion. To do that, the designer has to interlace the images.

But why doesn’t the interlaced image look, well, terrible? And what’s up with that term “lenticular?”
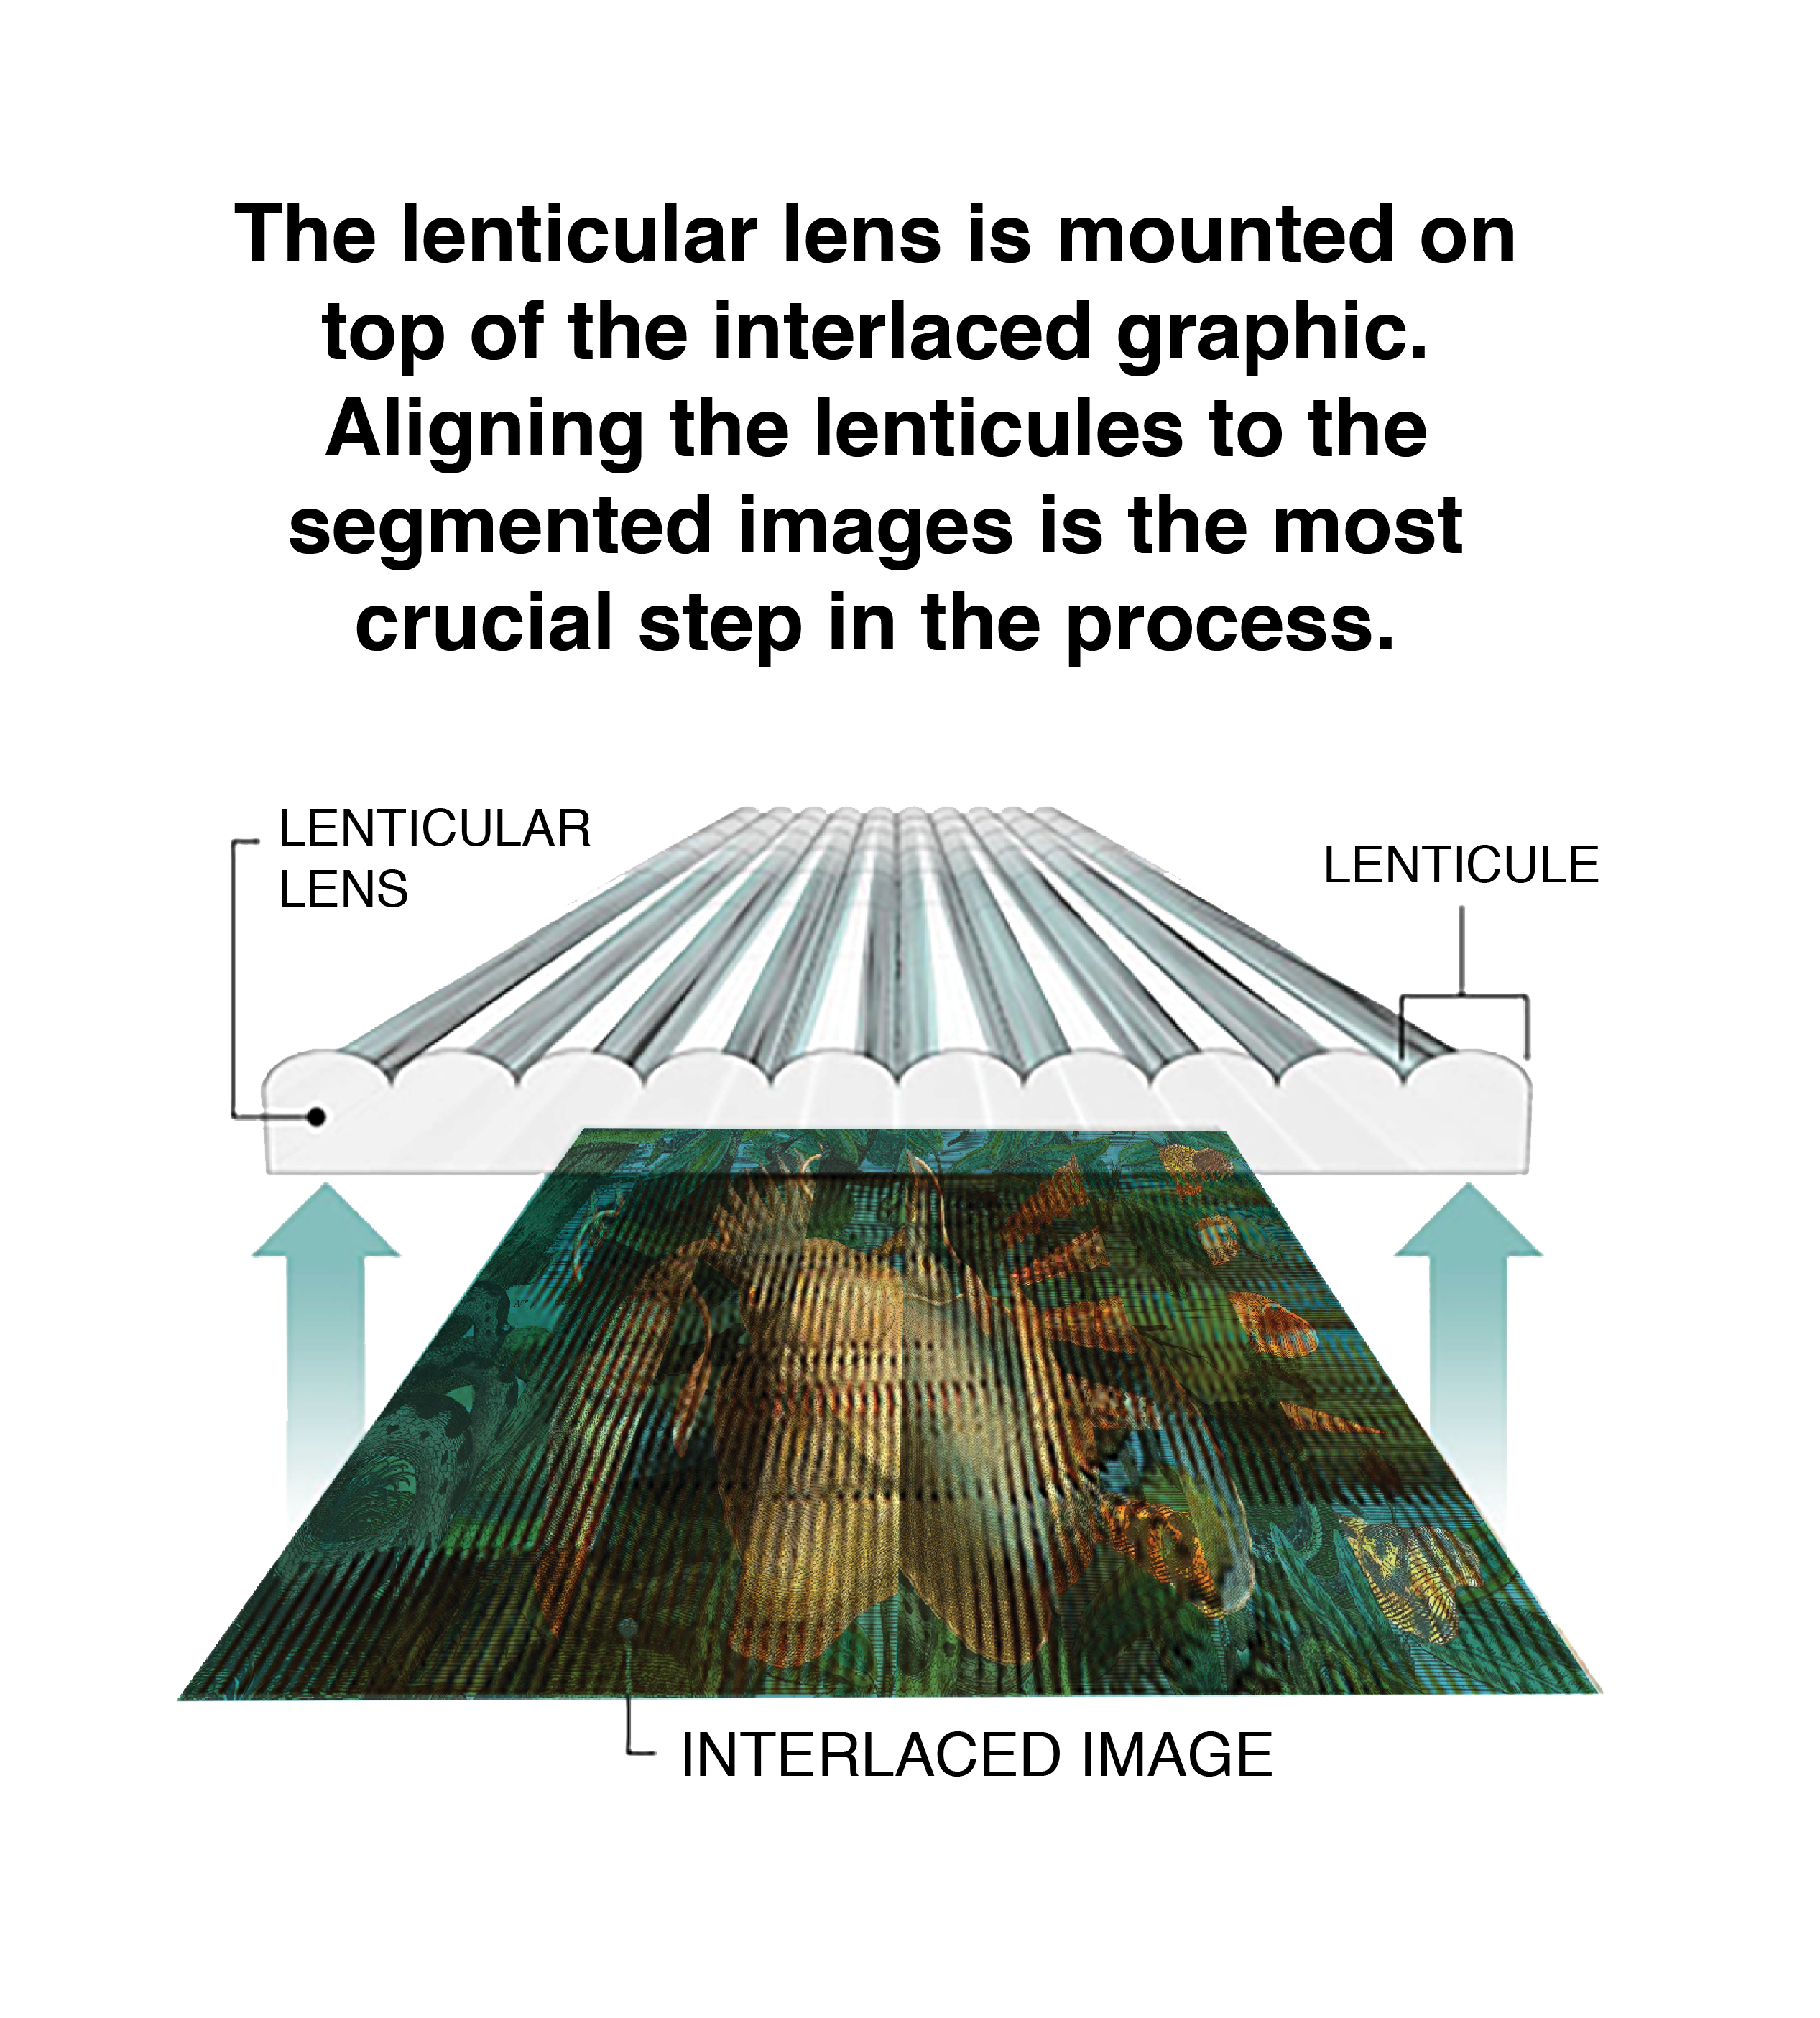
Lenticular comes from “lens,” meaning something curved that refracts lights. The lens that goes on top of the interlaced graphic is called a lenticular lens. It’s made of a series of curved strips called lenticules. Those curved strips refract the light so that you can only see images from certain angles. So the short answers: it’s called lenticular because it has lenses, and those lenses decode the interlaced image into the “changing” graphic.

Why use them?
Other than they’re really fun? Lenticular prints add impact to displays of static photographs and other images. They can also create a depth of content. By layering images on top of each other, a lenticular can show a before and after, or a variety of images on a theme in a way that shows shifts. Recently, Smithsonian Libraries worked with SIE to create lenticular prints for their exhibition Magnificent Obsessions: Why We Collect. Visitors could see the image of a prized possession, and then it would shift, showing the collector. Visitors can see a visual connection between the two images, and figure out that the stories behind those two images are intertwined.
Creating a Lenticular Print
The process for creating a lenticular print can be broken down into three phases: design, printing, and mounting.
Phase 1: design
First, decide on the type of lenticular print you would like.
There are three main options to choose from:
- Flip lenticulars create a smooth transition from one image to another using up to 15 frames (think of a flipbook). This type of lenticular can also be used to display 15 distinct images that change depending on viewing angle.
- 3D lenticulars are created using specialized 3D photography to simulate dimensionality and depth.
- “4D” lenticulars include a combination of flip and 3D imagery.
Then establish the viewing distance.
This is critical. Knowing how far away a visitor will be standing determines how the software translates the images when generating the final print. This also determines the appropriate lens material.
Finally, prepare the file.
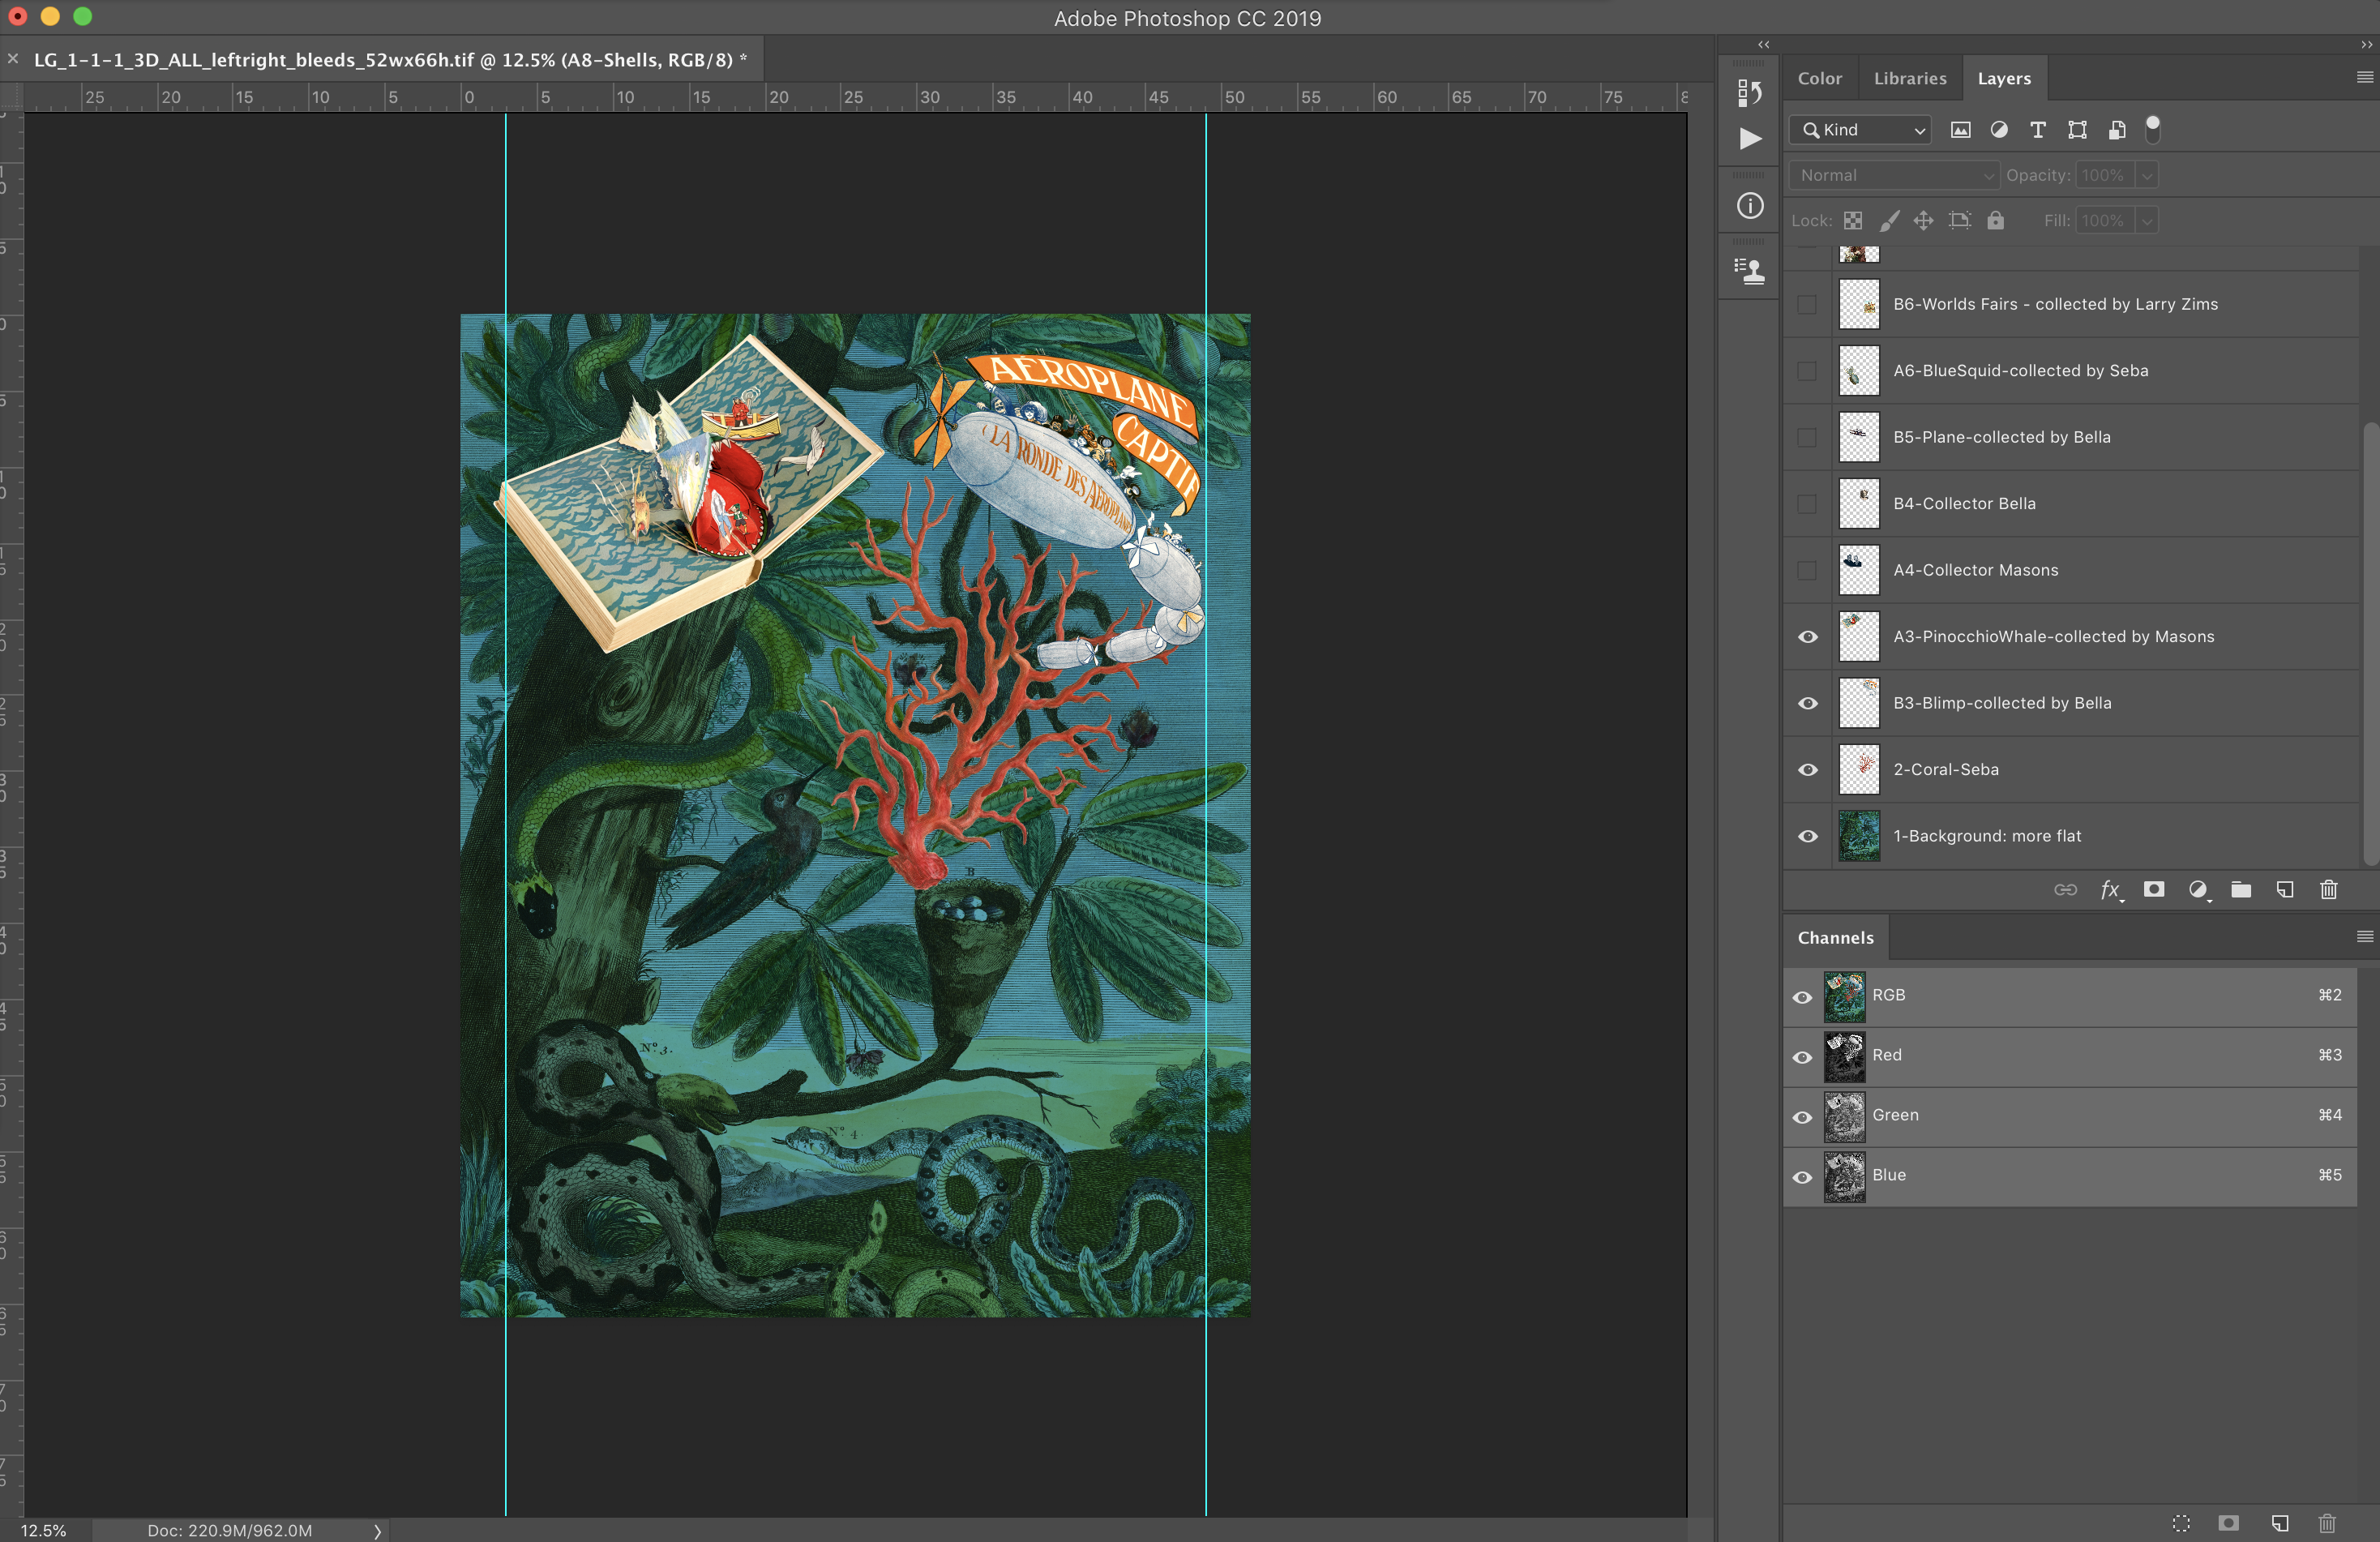
Depending on the lenticular type, the designer compiles a series of images in a layered Photoshop document, building the lenticular from the bottom up. This means the first layer is the background, and all of the other images are layered on top of the background. The images closest to the background look the farthest away.
The screen shots below show how designer Madeline Wan layered the images to create the Magnificent Obsessions lenticular.


Then, using specialized graphics software, the designer interlaces the the images.
Phase 2: Printing
The interlaced prints are produced on traditional wide format printers. For the Magnificent Obsessions graphic we used a specialty printing company, Parallax Lenticular Printing, to interlace and produce the final print.
Because the graphic is interlaced, it looks odd at this stage. If, for example, the finished product will be an animation composed of 15 images, the print will resemble 15 separate images that have been run through a paper shredder and then reassembled in the wrong order.
Phase 3: Mounting
The finished print is mounted to a clear plastic sheet with a pattern of lenses designed to pull specific images from the composite image.
Each image strip and lenticule must be aligned perfectly. Their proper alignment is what makes parts of the graphic recede back into the graphic, appear to float off the surface, or shift from one image to another.
Alternate Method: Combining printing and mounting
In some instances, the graphic can be printed directly to the reverse side of the lenticular film. This skips the often tedious (and sometimes problematic) step of laminating and mounting the interlaced image onto the lens. Going this route eliminates the risk of things like hair and air bubbles messing up the application of the lens. However, this method typically requires a much more complex printing setup, such as a screenprinter or UV Inkjet.
If you want to see Magnificent Obsessions in person—once the Smithsonian reopens—it’s on view at the National Museum of American History’s Dibner Gallery in 1 West. In the meantime, feel free to check out the Smithsonian’s various online resources.